Cool Soil Initiative
Addressing subsurface soil acidity with Curt Severin
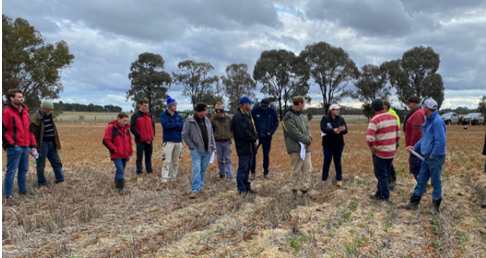
This case study is showcasing an example of how a farmer, Curt Severin from Brocklesby, has used technology to variable rate apply lime on his farm. Curt identified an issue with soil acidity on his farm and by partaking in two Riverine Plains projects, the Cool Soil Initiative and the GRDC’s Hyper Yielding Crops project, he has used various forms of technology and advice to quantify the problem and then implement and evaluate a solution. Curt has been able to compare two different treatments for application of lime on the paddock and measure the performance of each treatment.
Riverine Plains
Curt Severin
We were trying to get better value out of the lime, so back in 2015 we started pH mapping. Through our own experience and talking to others we found it better to apply the lime at different rates based on the pH mapping in the paddock, rather than doing blanket rates across the whole paddock. We are targeting a pH of 5.8 across the paddock, making blanket application across the paddock an inefficient way of applying the lime.
Another issue was that some of the soil testing was not making sense, for example in one test there was a pH of 4.2, but the paddock still produced a 3 t/ha canola crop. However, we then realized that the transect sample included cores from a small patch of the paddock that was quite acidic and wasn’t representative of the paddock. We could see some variation in the paddock but didn’t really have an understanding of the extreme nature of the pH, which can differ by a whole pH point, for example pH 4.2 to pH 5.2. In the first year when we did the mapping, we had the contractor apply 1.3t/ha to half of an unmapped paddock and 2t/ha to the other half based on separate transect samples. It had a massive effect on the paddock itself and the soil test results the following year showed the benefits of applying the two different rates of lime.
After we started doing the variable rate lime application, there were still some problems with production on some paddocks and we wanted to find out more. Targeted sampling with Precision Agriculture focused on areas that had been performing poorly for about three or four years running, especially in the dry years of 2018 and 2019. These segmented soil tests showed subsurface acidity levels of pH 3.8 at 10 – 15cm depth in the poor yielding area compared to pH 4.2in the better yielding area. Ryegrass also grew well in the poor performing area due to lack of crop competition, which was another indicator of a greater problem in these areas. We were applying the lime to the surface and we thought that the air seeder was incorporating the lime, but it was not.
By using some basic soil test kits, we could see that previously applied lime was just staying in the top 2cm and not moving into the root zone. The tests and yield results both showed that where we had been applying variable rate lime, we were getting a result but we questioned whether it could be better. We were applying the lime at the rate required where it was needed however, in some cases the lime was still at the surface and it was taking far too long to get to where it was needed, so we decided we needed to physically get the lime down deeper in the soil. The original pH mapping was far too shallow, as we only sampled 0-10cm. So next time we map we will do 0-20cm as well as segmented sampling to get more accuracy on where the lime is sitting.
To incorporate the lime, we looked at a number of machines to get the lime to where it was needed. With the help of Soil Science Company AgriSci, we identified that at 20cm there was slaking clay that we would not want to disturb with cultivation. We settled on the Lemken Rubin 12 which is full disc and no tynes. The limit of cultivation depth for the Lemken is 20cm compared to the Horsch Tiger which goes deeper but did not suit our purpose. The Lemken was able to mix the lime into the soil at 15-17cm and it was well mixed. It got the lime down into the worst area and 90% of the time fully incorporated the wheat stubble at the same time. It’s something I thought I would never say, but I bought a plough. It seems so wrong because it is something I have rarely done and it’s not common practice. We have gone an extra step this year and bought a grader board to smooth out and firm the surface afterwards to make it better for seeding. The Lemken is not too expensive to run because it is not going as deep as some of the other machines.
The outcomes are more targeted application of lime to try and fix soil issues where they are causing yield loss, which provides a more economic return from the lime that was applied. We are applying more lime than in the past. We realized we weren’t applying enough lime because we were testing the pH at 0-10cm, however the pH was declining in the 10-20cm zone. As a result of our investigations, we know where the problem is and we can address it.
It’s a bit tricky to tell as we have made other improvements such as new airseeder with liquid system. Any paddocks that I have tested with the pH indicator have shown that the pH has improved to depth. We have been able to address the acid issue that is deeper in the soil profile by using cultivation to incorporate the lime. We need to be aware that if it gets wet, it can be hard to seed cultivated paddocks as they risk being too wet compared to uncultivated soil. Also cultivation stirs up weeds such as dormant radish in the winter and heliotrope in summer. By the use of advisors, and being part of Riverine Plains projects has helped us to understand how the technology can be used and interpreted to manage our soils and maintain production on our farm.
It determines the amount of greenery in an area of land. An image of the paddock is generated where the darkest green represents large amounts of greenery and red shows little to no amount of greenery. For example NDVIs can be used to show poor growing areas in a paddock throughout the year.