Working with Tables
Tables are commonly used in the ‘Schedule’ section as well as marking rubrics in the ‘Marking criteria and standards’ section of each Assessment Item. It is important to ensure your tables display as expected within both the online and PDF versions of the Outline. Below is a summary of SOT tables functionality; plus handy tips and tricks.
Insert a new table
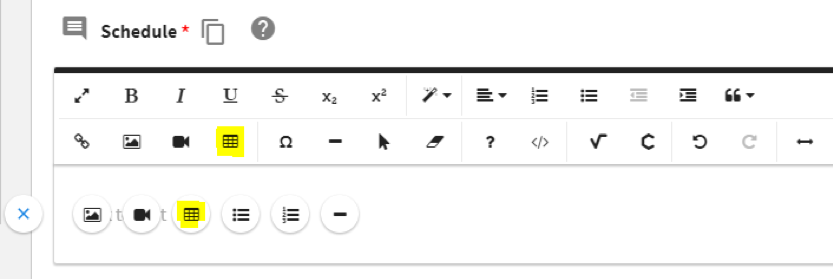
Use the ‘Insert Table’ button on the editor menu or via the ‘Quick Insert’ menu that appears as a circle with a blue plus icon to the left of your cursor whenever a new line is started. Select the number of rows and columns you’d like and click to add. The maximum insert-able size is 15 x 15; however, more rows and/or columns can be added via the table menu pop up once you have created your initial table.

Paste a table from another source
Use keyboard shortcut Ctrl + V to paste your table into the SOT editor. Pasting ‘clean’ tables from Microsoft Word and Microsoft Excel should provide a good outcome. However, complicated tables and tables with a complex history may behave in unexpected ways because HTML editors simply cannot consistently handle a wide variety of scenarios. See ‘Fixing Complex & Problematic Tables’ below.
TIP
The editor’s Code View option is available if you are comfortable using it to remove problematic code.
If you require assistance with your pasted table, including using Code View, raise an SRS request.
Table pop up menu
Click on the table to display the pop up menu. The following options are available:
Add header row
Click to add a header row atop the table.
Header rows have grey shading and bold, centred text.
Click again to remove the header row.
Where a table spans >1 page of the PDF, header rows will repeat on each page.
Remove table
Click to delete the whole table.
If deleted in error, use the Undo button or keyboard shortcut Ctrl + Z before clicking Save.
Insert/delete row
Click then select to insert a row above or below the cell you have clicked; or delete the row you have clicked.
Insert/delete column
Click then select to insert a column to the left or right of the cell you have clicked; or delete the column you have clicked.
Table Style – Width to 100%
Click to set the table width to 100% in the online and PDF versions.
Hover on the table or column edge to drag it to the desired width.
Merge or split cells
Highlight the cells you wish to merge; or click the cell you would like to split, then select the relevant option from the menu.
Cell background colour
Click in the cell then select the grey shade you wish to apply; or click the eraser icon to remove any existing shade.
Vertical alignment
Click in the cell then select either top, middle or bottom alignment.
Horizontal alignment
Click in the cell then select either left, centre, right or justified alignment.
Show/hide cell borders
Click in the cell then select the relevant option to show/hide all/top/right/left/bottom cell borders.
IMPORTANT: Cell walls are treated as double-walled. That is, the cell wall you wish to hide - AND - and its adjacent cell wall must be removed to hide the border. Click in a cell to quickly determine which borders are shown/hidden. All ‘shown’ cell borders will be highlighted with a blue border. The blue border disappears when a cell border is hidden. For example, to remove a left cell border:
- Click in the cell and select ‘hide left border’
- Click in the cell to the left of that cell and select ‘hide right border’

Fixing complex & problematic tables
Pasting ‘clean’ tables from Microsoft Word and Microsoft Excel should provide a good outcome. However, complicated tables and tables with a complex history may behave in unexpected ways because HTML editors simply cannot consistently handle a wide variety of scenarios.
That is, if the table has been updated over time with various merged cells, deleted or hidden rows and columns, complex formatting, etc it may not paste as expected. ‘Clean’ tables can be most easily handled and therefore will get the best outcome.
TIP
The editor’s Code View option is available if you are comfortable using it to remove problematic code.
If you require assistance with your pasted table, including using Code View, raise an SRS request.
Use a pre-filled schedule table
For pasting or easy reference, a tabled schedule pre-filled with actual dates for a session are provided in Microsoft Word. See Schedule Templates.
Use a url shortening service
Table cells do not handle long URLs well. They will cause column width issues and usually display issues in the PDF. If you must place URLs in a table, we recommend you check out popular URL shortening services like TinyURL, Bitly or Ow.ly to shorten them.
Use hyphens to manage column width
Similarly to long URLs, long words can cause column width issues. Insert a hyphen at the desired place in a long word to break it over to a new line.
- Subject Outline
- Author & QA Officer Editing
- Working with Tables

