Create assignments

The Assignment tool in Brightspace invites students to submit work as part of an assessed task or activity. Submissions can be documents like essays, reports, or image files. They can also be made via an observation in a lab, studio, or workplace.

When used effectively, Assignments in Brightspace offer high instructional value. They allow students to gain task-specific understanding and make changes to their work based on feedback.

To get the most from a Brightspace Assignment, consider:

  • what you intend students will do in the task or activity
  • what forms of evidence are required for assessment
  • how students will find out what is expected of them
  • how marking and feedback will operate
  • what standards and academic integrity expectations apply
  • equity, accessibility, and inclusion.

Setting up an assignment correctly in advance in a master site will mean that the assignment appears automatically in the subject site for each session.

How to

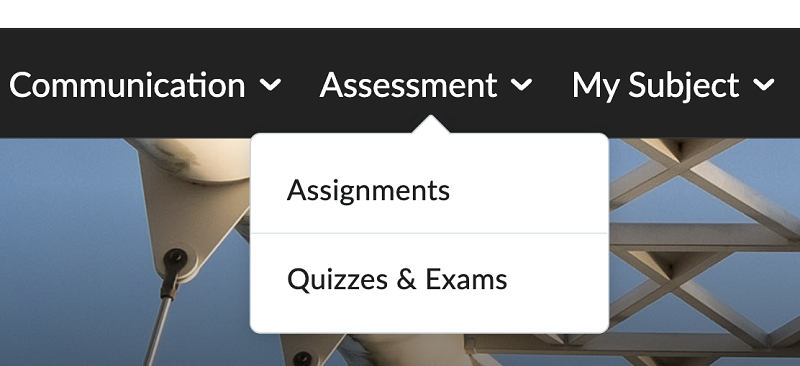
Screen capture image of an expanding menu in the Brightspace navigation bar labelled Assessment. One of the menu options is Assignments

To create an assignment:

  1. Go to your site homepage.
  2. Click on the Assessment expanding menu in the subject navigation bar.
  3. Select Assignments. This will open the Assignments tool in Brightspace. Screen capture image of the Assignments tool in Brightspace, with three buttons labelled New Assignment, Edit Categories, More Actions
  4. Click New Assignment. You can now begin setting up your assignment.

If your assignment carries an assessment weighting, you should add identifying information. This helps students locate and understand the assignment. It will also ensure you can identify it correctly in My Grades and Brightspace reports.

Use the following naming convention:

  • Cohort (BD, WI, PTI, etc.)
  • Assessment number (as per the Subject Outline schedule – 1, 2, etc.)
  • Title
  • Assignment type (in brackets – if not identified in the title)
  • For example: ‘BD: 3 – International Financial Reporting Standards (Report)’

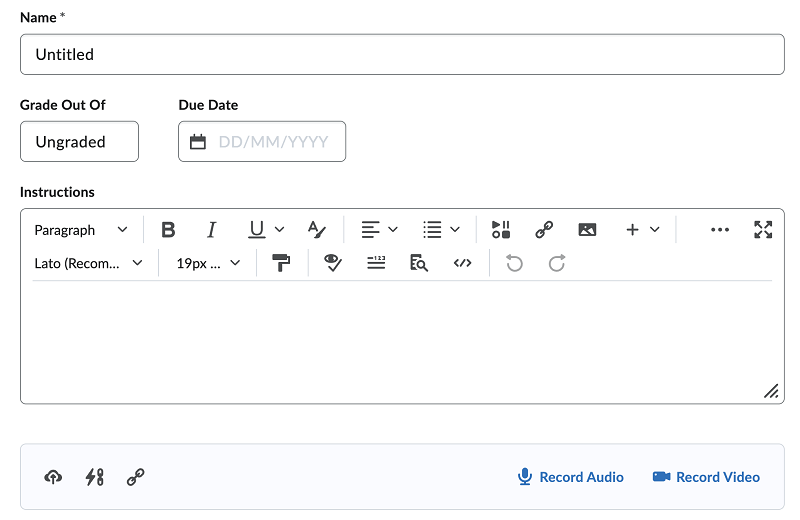
Screen capture image of the New Assignment screen in Brightspace, with three text entry fields labelled Name, Grade Out Of, Due Date

If the assignment carries an assessment weighting and you are working in the master site, leave the Grade Out Of field set to Ungraded. This field will auto-populate in the subject site when you link the assignment to the relevant grade item in My Grades.

We recommend adding a due date for all assignments. Adding a due date will create an event in the subject calendar and reminders for students. For assignments that carry assessment weighting, the due date must match the information in the Subject Outline.

If you add due dates in a master subject, you can update them later.  For example, if you set all dates in the master subject for the next teaching period, you can easily move them forward in bulk to set due dates for a subsequent year.

See Bulk edit dates in manage dates in the Brightspace Community.

Alternatively, you can leave the due date field blank in the master subject and add dates later, in the subject site.
Screen capture image of the New Assignment screen in Brightspace, with a text entry field labelled InstructionsAdd instructions to help students understand what to do in the task or activity, and what evidence is required for assessment. For example, you might include:

  • information copied from Tasks in the Subject Outline
  • guidance about the assignment, in addition to what is in the Subject Outline
  • links to external resources
  • content from third-party tools, such as Panopto
  • one or more file attachments, such as a template
  • audio or video instructions.

To choose submission options:

  1. Expand Submission and Completion in the accordion on the right-hand side.
    Screen capture image of the New Assignment screen in Brightspace, with part of an accordion labelled Submission and Completion]
  2. If you have not previously created any categories to help organise your assignments, you can define a new category here by selecting the Category drop-down and choosing New category. If you’re not intending to use categories, leave this option set to No category.

    Assignment categories are used to group and organise assignments, making it easy for students to identify the correct assignment from those listed in the site. For example, you might decide your assignment belongs in a category called Workplace Tasks.
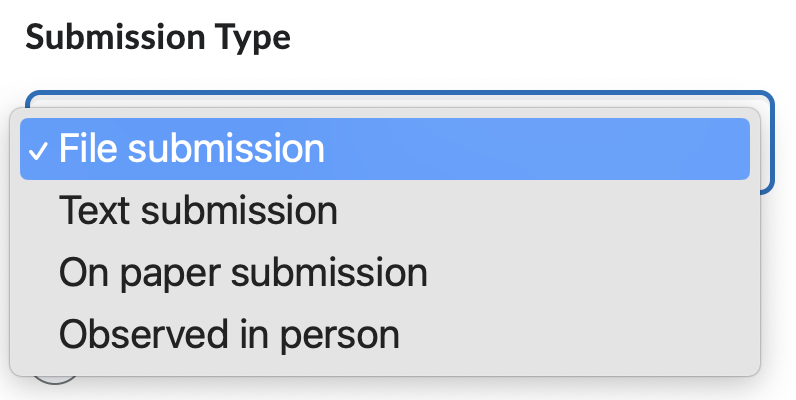
  3. Select the type of submission students will make, using the Submission Type menu.
    Screen capture image of a drop-down menu in Brightspace labelled Submission Type

    File submission is the type used in most assignments. In a text submission, students add content directly from the Brightspace text editor instead of uploading files.

    If you choose On paper or Observed in person, you will need to specify how Brightspace will know when a student has completed the assignment.  This can be done manually by the student, automatically when the assignment is marked, or automatically on the due date, depending on the setting you choose.

For file submission type assignments, there are four further settings:

  1. Files allowed per submission
    Click Unlimited. This will allow students to check for plagiarism using Turnitin's similarity reports before final submission, refine their work based on the feedback provided by Turnitin, and submit their best possible work.
  2. Allowable file types
    This menu allows you to specify the types of file students can submit.

    Screen capture image of the Allowable File Extensions drop-down menu in Brightspace, containing the options No Restrictions, PDF Only, Annotatable Files, Files that can be previewed without conversion, Images and Videos, Custom File Types, Compatible with Turnitin]

    If the assignment does not require students to submit a specific file type, we recommend selecting Annotatable Files.

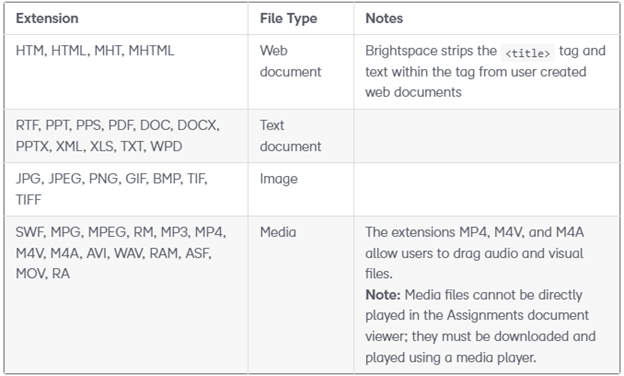
    When this option is chosen, only commonly used file types that are supported for annotation in Brightspace may be submitted, such as .docx, .pdf, .xlsx, and .png. Using this setting prevents students from making file submissions that are difficult to access and review.
    For a full list of the file types permitted with the Annotatable Files setting, see File types supported by Annotations in the Brightspace Community.

    If the assignment requires students to submit a specific file type, choose the PDF Only, Images and Videos, or Custom File Types options.
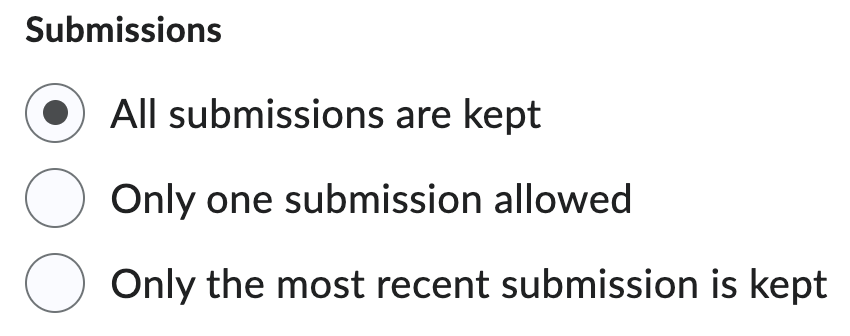
  3. Repeat submissions
    Screen capture image of the Repeat Submissions radio buttons in Brightspace, containing the options All submissions are kept, Only one submission allowed, Only the most recent submission is kept

    This setting allows you to choose whether to allow multiple submissions to the same assignment.  You can also choose whether to retain all submissions, or just the most recent one.

    All submissions are kept is the most common and appropriate setting in most scenarios.
  4. Notification email
    If desired, Brightspace can send an email to a specific mailbox each time a student submits a file. To avoid a high volume of emails, we recommend leaving this field blank.

To choose marking and feedback options, expand Evaluation and Feedback in the accordion on the right-hand side.

  1. Rubrics
    Add any rubric that is to be used. If the rubric already exists in Brightspace, select Add Existing. If a new rubric needs to be created, select Create New to launch the Rubric tool.
  2. Annotation tools
    Make sure the option Make annotation tools available for assessment is selected.
  3. Turnitin integration
    The Brightspace Turnitin integration allows Turnitin similarity reports to be created and viewed as part of the assessment and feedback process.

To set up Turnitin for an assignment:

  1. Click Manage Turnitin.

    Screen capture image of the Evaluation and Feedback area in Brightspace, showing the Manage Turnitin button
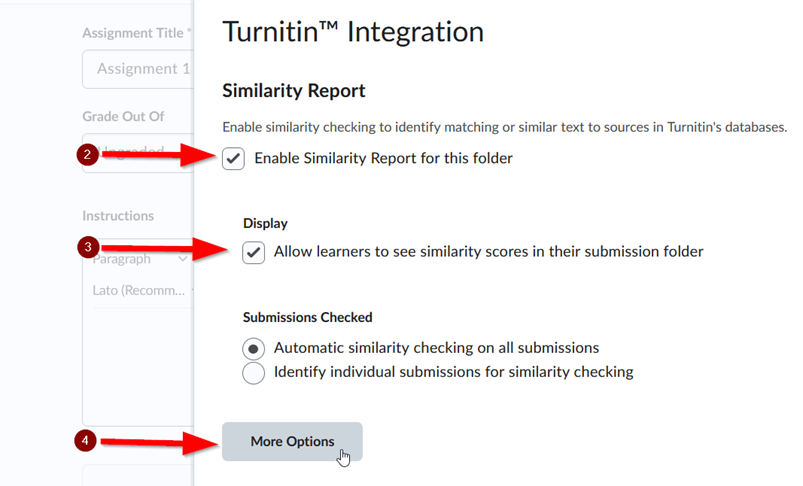
  2. In the dialogue that appears, select the following options:
    • Enable Similarity Report for this folder
    • Automatic similarity checking on all submissions
    We also recommend selecting: Allow learners to see similarity scores in their submission folder.

    Screen capture image of the Turnitin integration dialogue in Brightspace
  3. Click More Options.

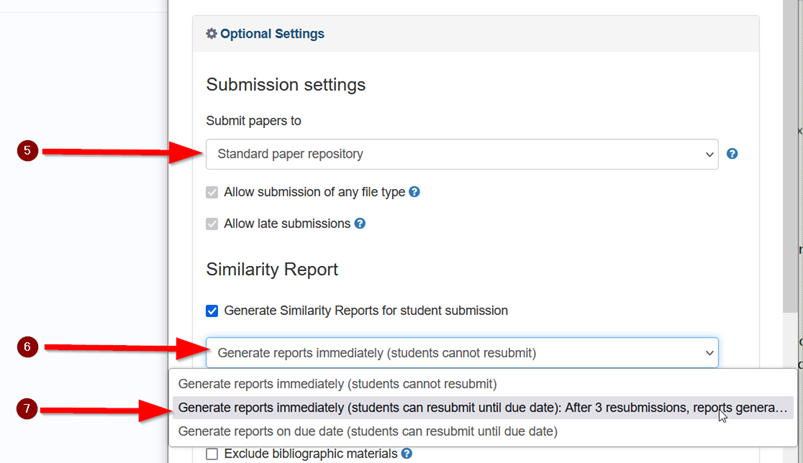
    In the Optional Settings window that appears, ensure the Submit papers to standard paper repository option is selected.

    In Similarity Report, we recommend selecting the second option: Generate reports immediately (students can resubmit until the due date) – after 3 resubmissions, reports are generated after 24 hours.

    Other recommended settings:
    • Exclude bibliographic materials – leave unticked
    • Exclude quoted materials – leave unticked
    • Exclude small sources – leave unticked

    In Compare against, select the following options:
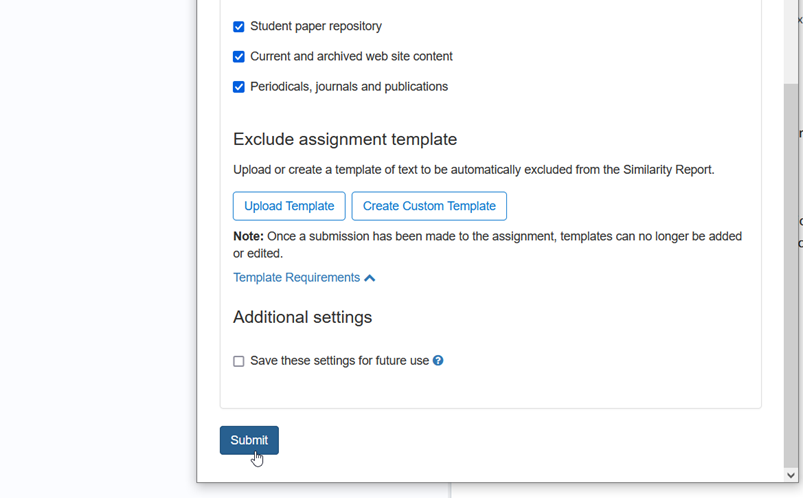
    • Student paper repository – ticked
    • Current and archived website content – ticked
    • Periodicals, journals and publications – ticked

    An assignment template can be uploaded to this window and excluded from the report if desired.

    Screen capture image of the Turnitin Optional Settings window in Brightspace
  4. Click Submit and then Save. A tick icon should appear above the Manage Turnitin button, with the text Similarity Report On.

Click Save and Close to finish creating your assignment.

In the Assignments tool, icons next to the assignment name show when the assignment is hidden from students, and when the Turnitin integration is enabled.

To duplicate an assignment, click on the Assessment expanding menu in the subject navigation bar. Select Assignments. This will open the Assignments tool in Brightspace.

In the Assignments tool, click the drop-down arrow to the right of the assignment, and click Copy Assignment.
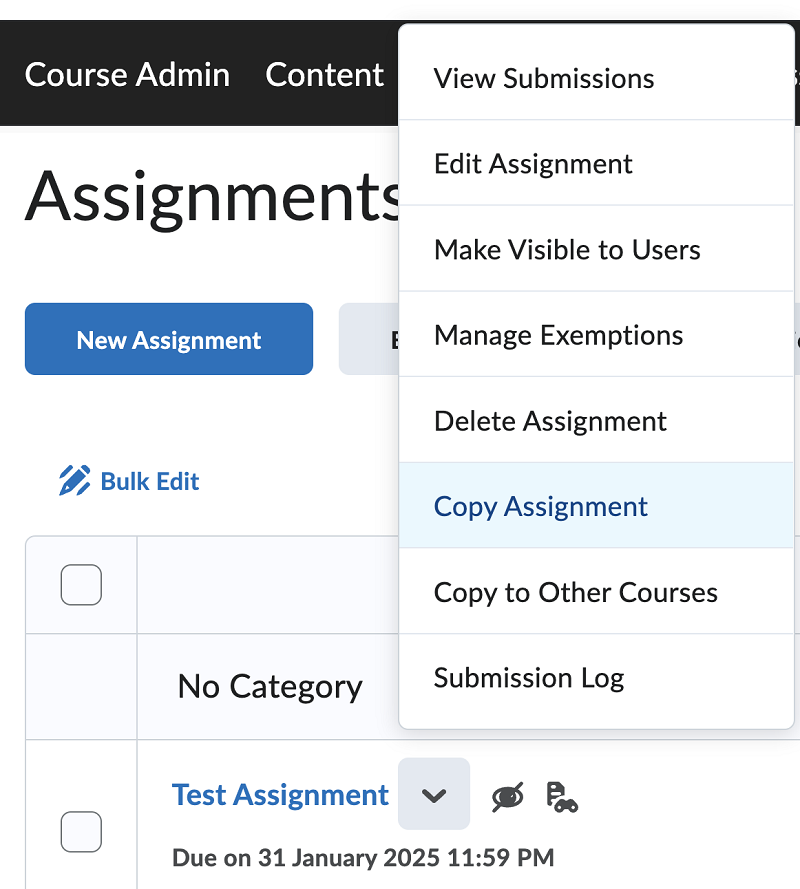
Screen capture image of the Assignments Tool in Brightspace with a drop-down arrow and a menu of options to the right of the assignment name

Change the name, by changing the student cohort or other elements of the name as required. See Add Identifying Information (above).

The Turnitin integration must be enabled each time you duplicate an assignment.

Click Save and Close when the duplication is complete.

This page may be updated at any time. If you print it, you could miss future changes. Please check this page regularly for the latest updates.