This article describes steps you can take to finalise an assignment for use in teaching.
To create an assignment from scratch, see Creating Assignments in Brightspace.
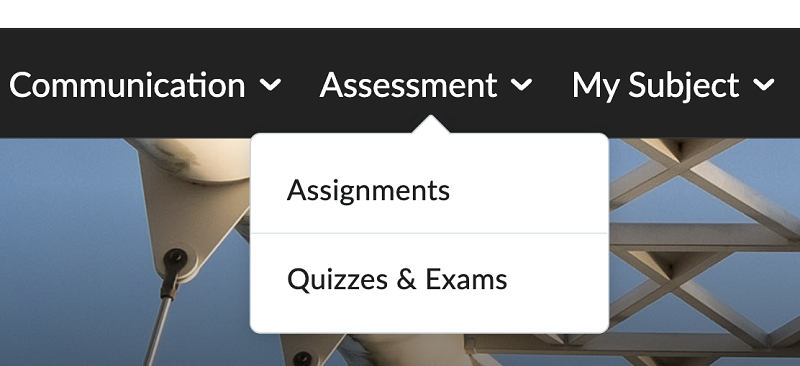
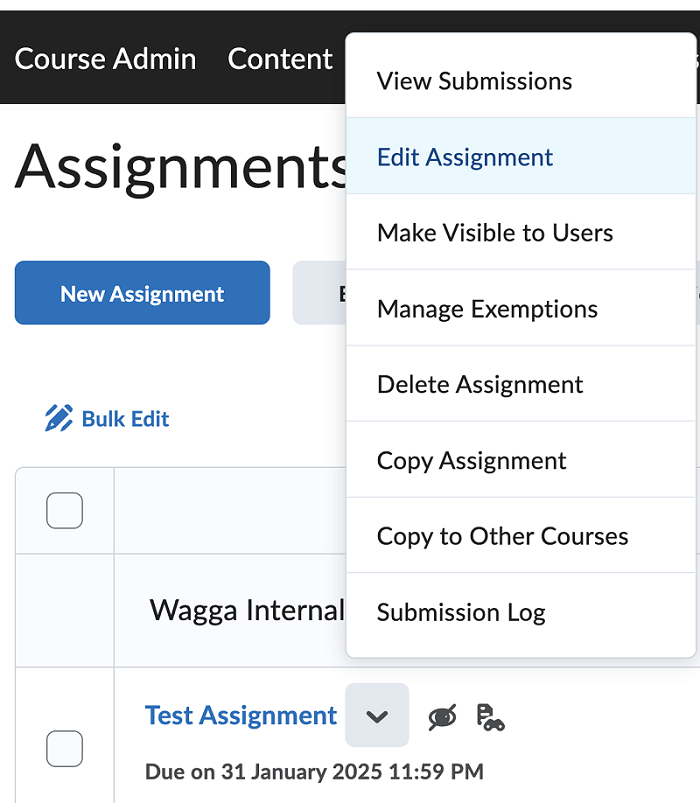 Then:
Then:
Add the due date in the Due Date field. For assignments that carry assessment weighting, the due date must match the information in the Subject Outline.
When a due date is added, Brightspace will automatically create a subject calendar entry and send reminders to students.
By choosing grade settings in Brightspace, you confirm the mark value and any assessment weighting of your assignment. This allows marks to be recorded correctly in Brightspace. It also ensures that, where appropriate, they are included in a student’s overall mark and grade.
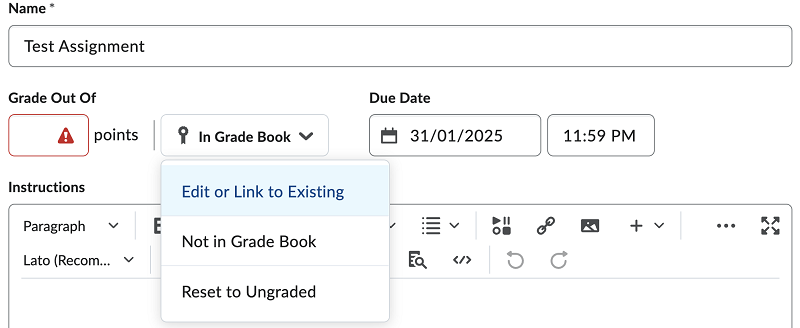
For an assignment with assessment weighting, once you have clicked Edit or Link to Existing, a dialogue will appear.
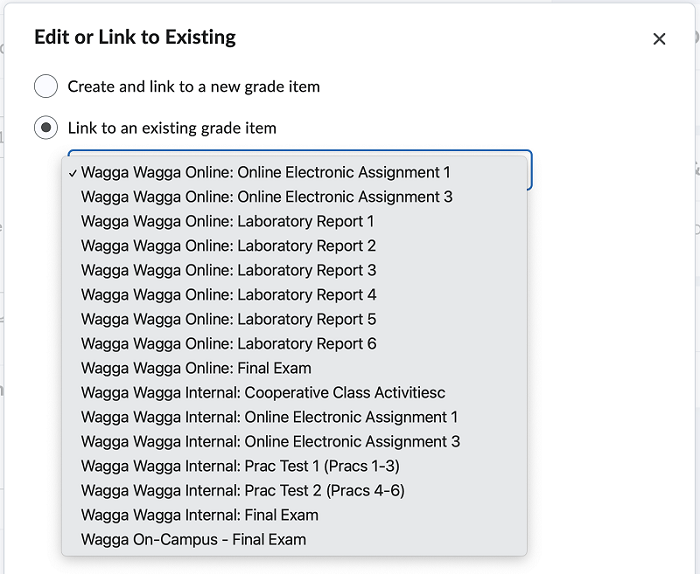
The point value assigned to the grade item in My Grades appears in the Grade Out Of field and the In Grade Book button changes colour. This confirms that the assignment is linked to My Grades.
Where the subject is graded using the normal grading scale (HD, DI, CR and so on), the value shown in the Grade Out Of field will be the overall percentage value of the assignment in the subject.
For example, an assignment with a Grade Out Of value of 20 is worth 20% of the overall mark for the subject.
This value can be the same as the mark available for the assignment, or it can be different. If the rubric has a total score higher than the Grade Out Of value, Brightspace will automatically convert each mark when it is transferred to My Grades.
For example, assignment marked out of 60, worth 20% of the mark
Rubric Total Score value is 60
Grade Out Of value is 20
If a student scores 30/60, the mark transferred to My Grades will be 10/20.
By setting availability dates and times, you determine the period during which students will be able to see and submit an assignment.
Together with the settings in My Grades, the assignment availability settings also allow you to control the visibility of the mark and feedback during the marking process.
To set availability dates from the Edit Assignment screen, expand Availability Dates and Conditions in the accordion on the right-hand side.
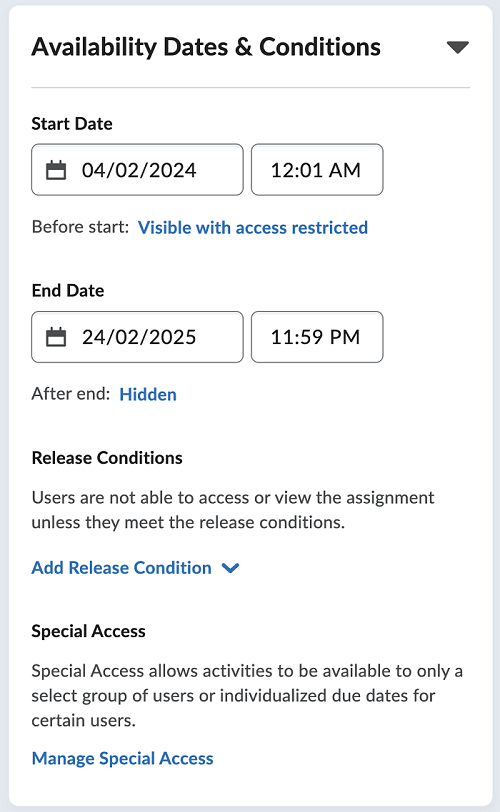
You can choose a start and end date and time. By default, times are set to 12.01 am on the start date and 11.59 pm on the end date.
You can also choose how the assignment will appear to students outside of the availability dates. Before the start date and after the end date, an assignment may be:
If you prefer to prevent students without an extension from making a late submission, we recommend setting the end date on the same day as the due date.
Otherwise, we recommend setting the end date on the date when you expect marking to conclude.
If a student has a due date extension applied as a reasonable adjustment or as an outcome of an extension or special consideration request, the assignment will continue to be visible and open for submission for that student until the due date extension. The end date setting you choose will be overridden for that student for the duration of the extension. After the extension ends, the end date setting you choose will apply to the student. See Allow Special Access below.
By default, students will be able to see marks and feedback for an assignment once they are published to My Grades, even if the end date has passed and the after end-date availability is set to Hidden.
If you wish to prevent students from seeing marks and feedback when they are published to My Grades, follow the steps in the next section.
You can prevent students from seeing assignment marks and feedback when they are published to My Grades in the following way. This method uses a combination of assignment visibility settings and category settings in My Grades.
The marks and feedback will become available to students.
Setting release conditions allows you to release an assignment to a specific student cohort.
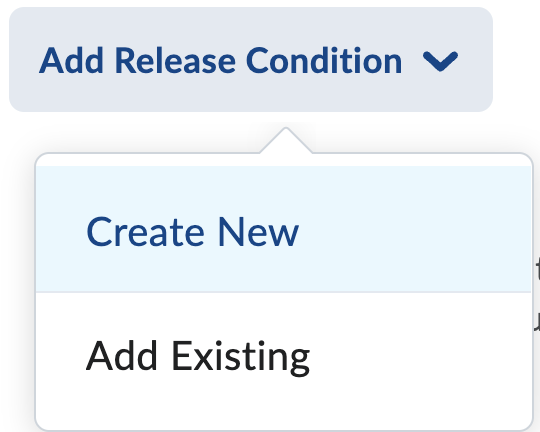
In the dialogue that appears, make the following selections.
![Assignment Create Release Screen capture image of a dialogue labelled Create a Release Condition.]](https://cdn.csu.edu.au/__data/assets/image/0010/4285036/AssignmentCreateRelease.png)
Only students enrolled in the selected section will be able to see and submit the assignment when it is made visible.
To create duplicate copies of the assignment for each section, see Creating Assignments.
The special access feature of Brightspace allows you to apply a due date extension for a student. This may be because of a reasonable adjustment or as an outcome of an extension or special consideration request.
![Assignment Manage Special Access Screen capture image of a dialogue labelled Manage Special Access.]](https://cdn.csu.edu.au/__data/assets/image/0006/4285041/AssignmentManageSpecial.png)
![Assignment Special Properties Screen capture image of a dialogue labelled Properties with a field allowing a search by user, and fields that allow the due date and start and end dates and times to be changed.]](https://cdn.csu.edu.au/__data/assets/image/0007/4285042/AssignmentSpecialProperties.png)
The special access arrangements you have entered are summarised on the Edit Assignment screen.
The new Evaluation Functionality applies to the Assignment assessment type only. It includes four components.
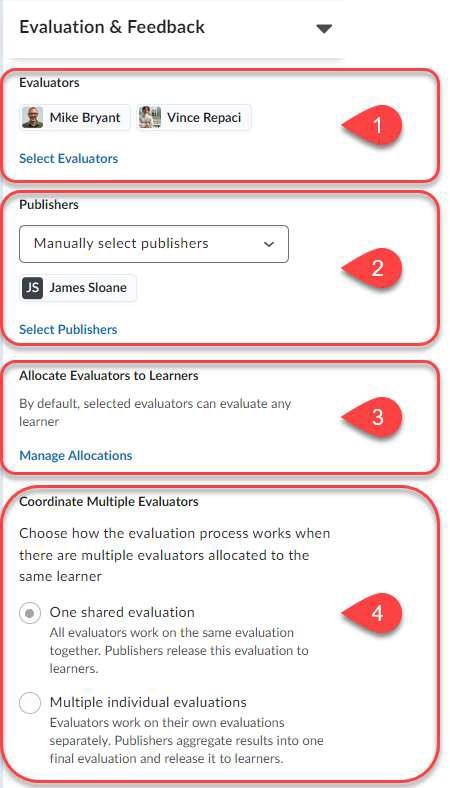
Evaluators are selected via pop up page that displays when the ‘Select Evaluators’ link is clicked on.
Users appearing in this list will be based on those with user roles in the class list with the following Assignment permissions.
Evaluators may be amended after submissions have been received.
There are three options when nominating publishers,
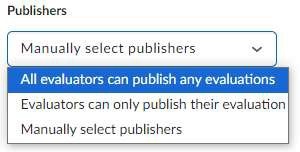
If the option to ‘Manually select publishers’ is chosen, clicking the ‘select Publishers’ link will display a pop-up page with a list of users to select from.
Users appearing in this list will be based on those with user roles in the class list with the following Assignment permissions.
To manually assign a Publisher – the user will need to be enrolled in all Sections.
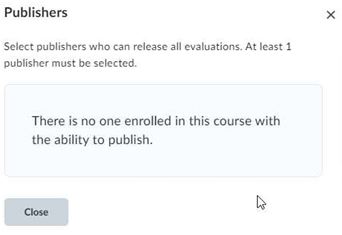
If there are no users enrolled in all sections, the following message will appear.
Publishers may be amended after submissions have been received.
After selecting evaluators, you may also choose to allocate students to each.
Clicking on the ‘Manage Allocations’ link will open a table displaying all students and the evaluators.
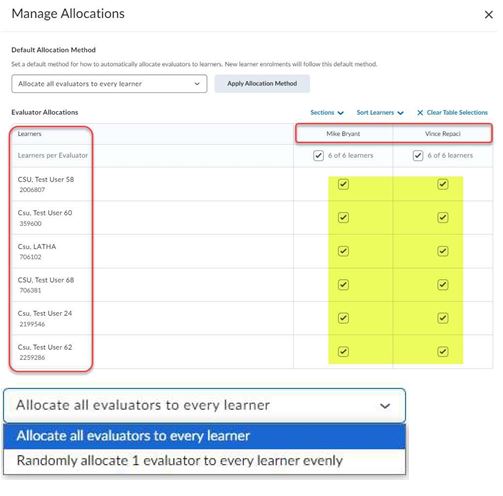
By default, every student is allocated to every evaluator, however you may change this by either changing the option via the list to ‘Randomly allocate 1 evaluator to every learner evenly’ or you may manually allocate by checking/unchecking.
The allocation function used with either multi-evaluators option will control which of the evaluators can add marks and feedback to each student. This would be used with or in place of marking groups.
Allocations may be amended after submissions have been received.
When using the Advanced Evaluators function, you have 2 options of how an assignment is marked by multiple evaluators.
CAUTION Once submissions have been received for the assignment, these options are not able to be changed.
This is the default setting, where all evaluators will contribute to each submission.
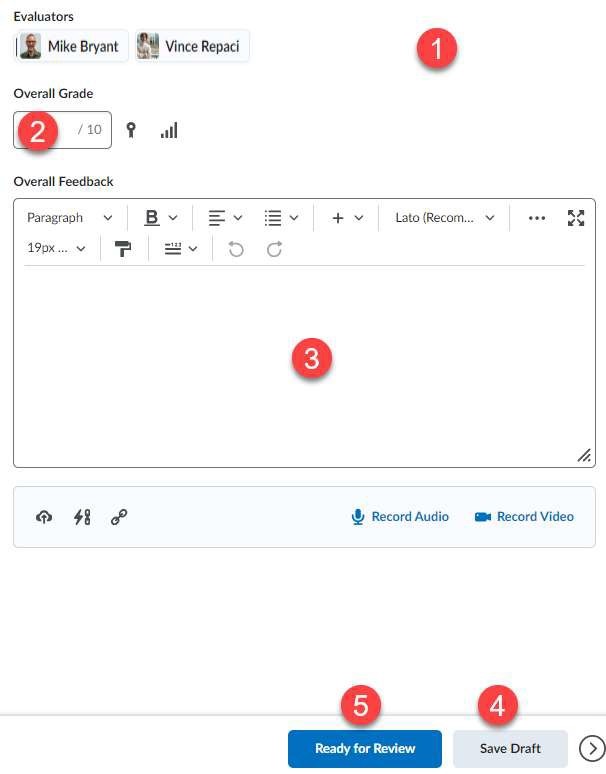
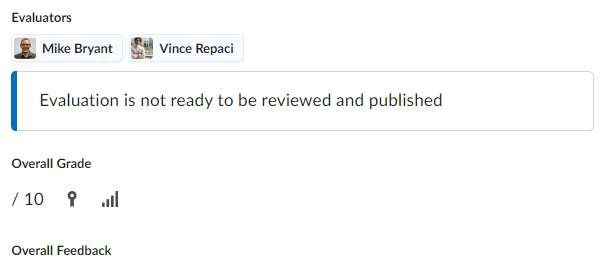
If the ‘Ready for Review’ button is not clicked on, then the publisher will receive a message that the evaluation is not ready to be reviewed and published.
When using the allocation function with this option, each evaluator will only have access to add mark and feedback to those students that have been allocated to them.
Other evaluators will see the mark and feedback in read only.
This option allows each evaluator to add their own specific mark and feedback.
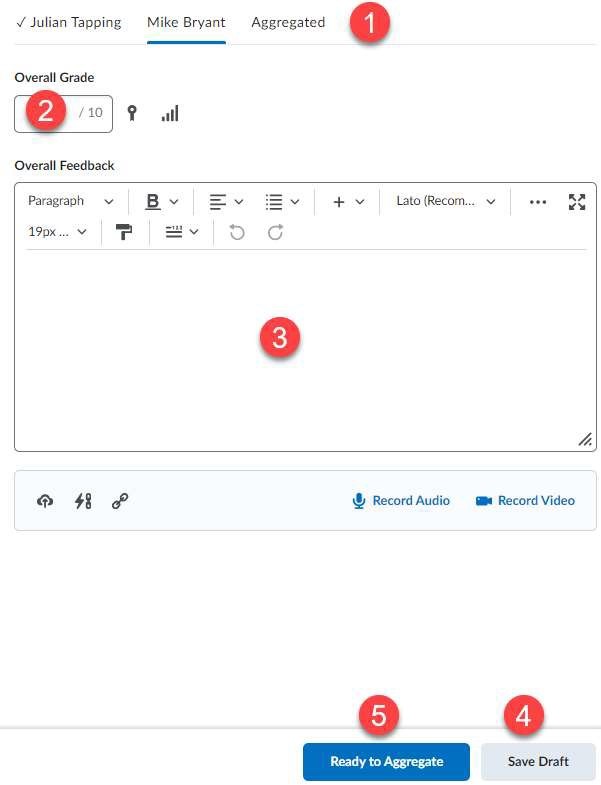
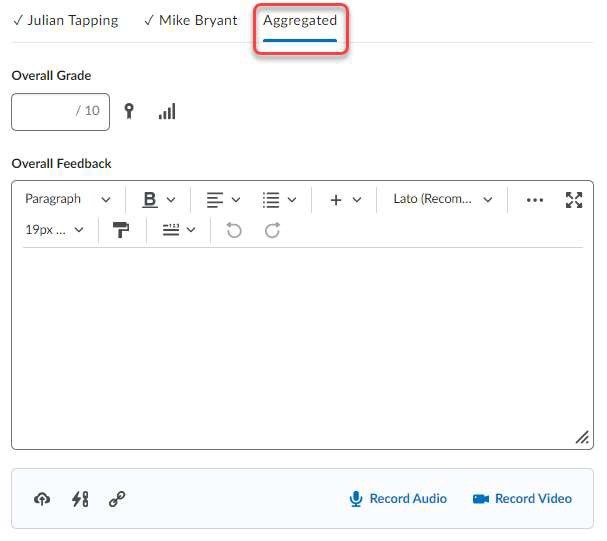
The Publisher will be required to complete the ‘Aggregated’ tab in order to complete the evaluation.
This tab is NOT auto populated.
The intended process is that the publisher will review each of the evaluator’s marks and feedback and will decide the final mark and feedback and add it to the fields provided.
It is this mark and feedback that will be sent to the gradebook and will appear to the student.
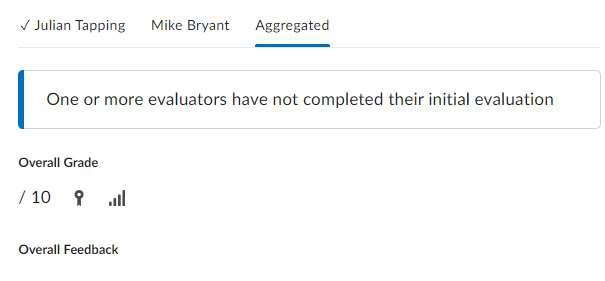
If one of the evaluators have not clicked on the ‘Ready to Aggregate’ button. This aggregated tab is not able to be completed (or published) and they will see a message indicating this.
The evaluator in question can be identified by NOT having a ‘tick’ next to their name tab.
When using the allocation function with this option, each evaluator will only have access to add mark and feedback to those students that have been allocated to them. Other evaluators will see the mark and feedback in read only. Plus, it will enable the Aggregate tab to be populated once the allocated evaluator have completed and clicked on the ‘Ready to Aggregate’ button only.
The Hidden/Visible toggle switch at the foot of the Edit Assignment screen should show as Hidden. Students who meet your availability and access conditions cannot yet see the assignment.
Toggle the switch to Visible.
![Screen capture image of three buttons on the Brightspace edit assignment screen labelled Save and Close, Save, and Cancel. A toggle switch to the right of these buttons is set to Visible.]](https://cdn.csu.edu.au/__data/assets/image/0006/4285050/AssignmentVisible.png)
Click Save and Close to finish. Students who meet your availability and access settings will be able to see the assignment.
Icons next to the assignment name in the main Assignments screen summarise the settings you have applied. You can change the assignment visibility at any time directly from this screen.
You can use announcements, checklists, and/or content pages in Brightspace to tell students about assignments.
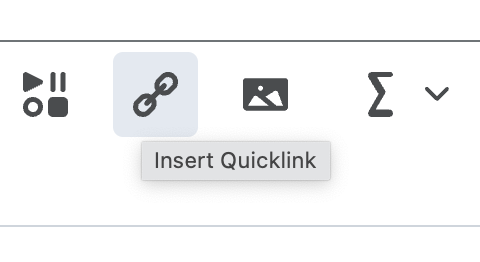
A link to the assignment can be created from your announcement, checklist or page using the QuickLink feature.
In addition, students will see a subject calendar entry and reminders linked to the assignment due date.
This page may be updated at any time. If you print it, you could miss future changes. Please check this page regularly for the latest updates.