How to manage multiple markers

Some subjects and assessments will require multiple markers, where each marker is assigned a number of student submissions to mark. To make it easier for markers to identify and access the students' submissions they are marking you can use the Groups tool.

To do this you will need to:

  • Create student groups using the Groups tool.
  • Assign markers to a group.
  • Filter assessment submissions to view only your group.

Create student groups using the Groups tool

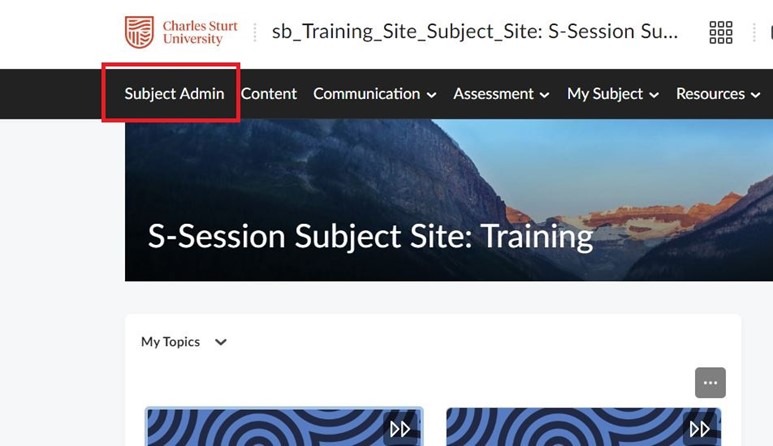
  1. Click on the Subject Admin expanding menu in the subject navigation bar.

    A screenshot of the subject navigation bar in Brightspace with the Subject Admin menu selected

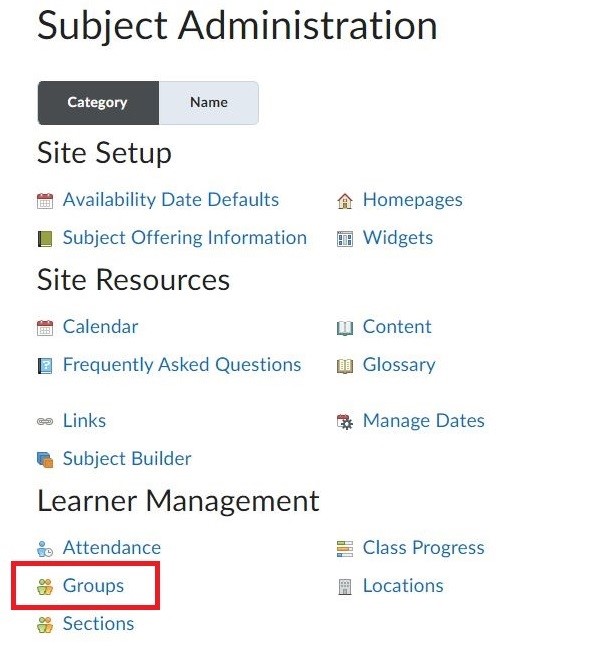
  2. Click Groups.

    A screenshot of the Subject Administration page in Brightspace. The Groups tool is selected

  3. Click New Category.
  4. Enter a Category Name.
  5. Under Enrolment Type, click Groups of # or # of Groups from the drop-down menu.

    A screenshot of the Groups tool in Brightspace. The Category Name and Enrolment Type are selected

    Group information (name and members) is visible to students. If you would prefer, you can de-identify the purpose of the groups by using a name such as “Groups”.

    Groups of # - this is for when you know how many students should go in each group. The number of groups will then depend on how many students are enrolled. Brightspace will allocate the students automatically.

    # of Groups - this is for when you know how many groups you want and Brightspace will allocate the students automatically.
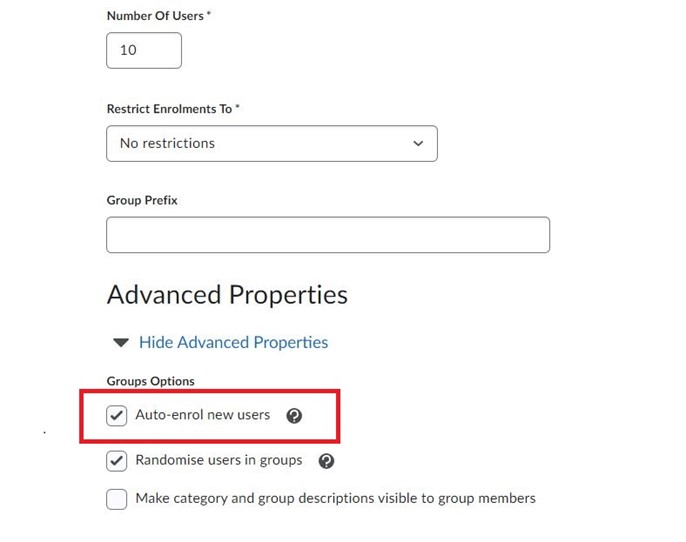
  6. Enter the number of groups or number of users.
  7. Optional: Restrict Enrolments To a particular section if you don’t want the markers marking across all cohorts.
  8. Under Groups Options, click the checkbox next to Auto-enrol new users. This ensures that when new users are enrolled in a subject after groups are set up, they are automatically added to the group with the fewest users.

    A screenshot of the Groups tool in Brightspace. The Auto-enrol new users checkbox has been selected

  9. Click Save.

If you want to change the name of the groups, click on each group individually and update the group name, then click save.
Filter student submissions by group

  1. Click on the Assessment expanding menu in the subject navigation bar.
  2. Click Assignment.
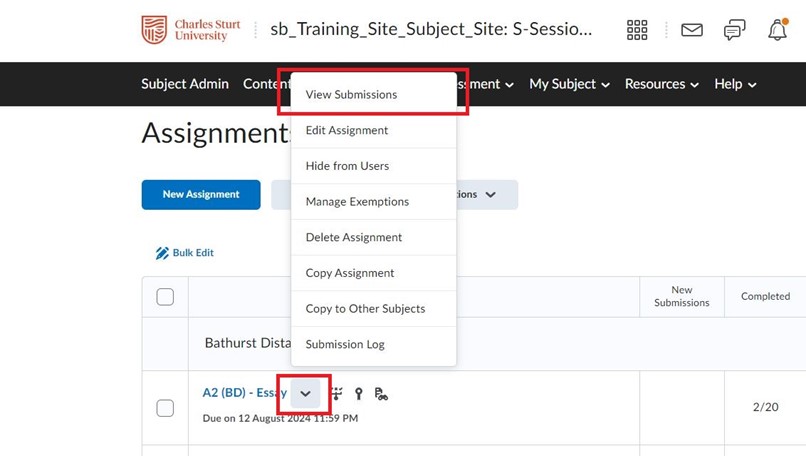
  3. Click the dropdown arrow for actions and click View Submissions.

    A screenshot of the Assignments tool in Brightspace. The View Submissions option has been selected

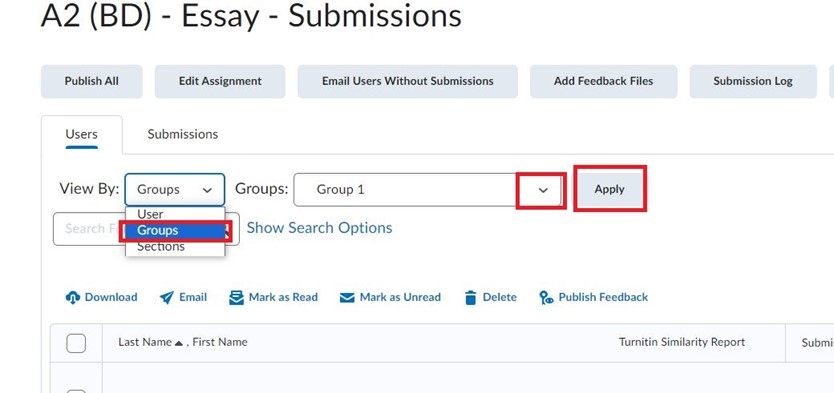
  4. Use the View By drop-down to select Groups.
  5. Choose the group that you are responsible for marking and click Apply.

    A screenshot of the Submissions tool in Brightspace. The group has been selected using the View By drop-down

  6. You can now mark the student submissions.

For more information on marking, see Mark Discussions.A screenshot of the Groups tool in Brightspace. The Category Name and Enrolment Type are selected

This page may be updated at any time. If you print it, you could miss future changes. Please check this page regularly for the latest updates.