For students, the My Grades tool offers an up-to-date overview of marks and feedback released in a subject during a session. For staff, it offers a working summary of marks and grades prior to grade finalisation.
My Grades should be set up prior to the commencement of teaching. This saves time, eliminates error, and minimises queries.
This article describes essential steps to set up My Grades and the additional features included in the tool.
My Grades consists of a series of fields known as grade items, set out as a digital ‘mark book’. Grade items contain numerical or other information about a student’s performance in the subject.
Grade items may be:
Weighted grade items are created automatically from the assessment information in the Subject Outline. The marks they contain are compiled from the different assessment tools in the Brightspace site.
Weighted grade items are automatically totalled and converted to a grade, using the grading scale applicable to the subject. In Brightspace, the outcome of this process is known as a calculated grade. The calculated grade can be manually adjusted during moderation. It can also be overridden with an approved administrative grade.
Calculated grades, adjusted grades, and administrative overrides are not visible to students in Charles Sturt’s Brightspace system.
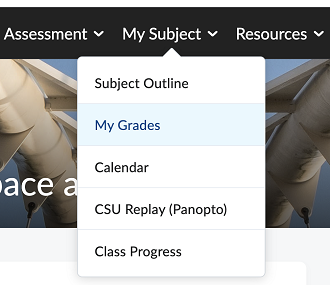
To open Grade book (My Grades):
When you first open My Grades, the Enter Grades tab will open. This tab allows you to view students’ marks for each grade item.
![Screen capture image of the Enter Grades tab in My Grades. There are two other tabs, labelled Manage Grades and Schemes. In the Enter Grades tab, there are buttons labelled Import, Export, Switch to Spreadsheet View, drop-down menus labelled More Actions and View By, a Search field, and an option to Show Search Options. There is also a table containing student names and marks for grade items.]](https://cdn.csu.edu.au/__data/assets/image/0007/4286707/EnterGradesTab.png)
The table rows refer to students who are enrolled in the site. The columns consist of grade items. The name of the grade item appears at the top of the column. You will also be able to view the student ID as a separate column.
To view all progress information for a student, click the graph icon to the left of a student’s name. A new window/tab will open, and progress information for the student will be shown.
To view the submission linked to a mark, click the submission icon to the left of the mark. A new window/tab will open, and the submission will be shown.
To check that all the necessary grade items are present in My Grades:
In these cases, it will be necessary to change the grade items listed or create new grade items. See Manually edit or create a grade item below.
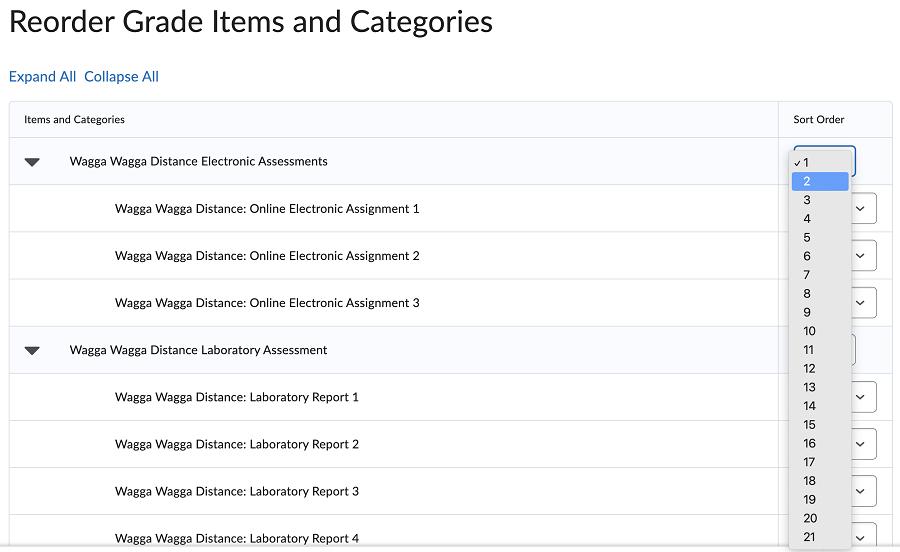
Where the normal grading scale is being used, weightings should add up to 100. If grade items for more than one section are listed and your role in the site allows you to view more than one section, you will see a multiple of 100 for the number of sections. For example, if you can see grade items for 2 sections, the weighting total should be 200.
Check the weightings and totals are correct. If not, the percentages applied to assessment tasks will need to be changed in the Subject Outline Tool and the corresponding weightings for grade items changed in My Grades. See Manually edit or create a grade item below.
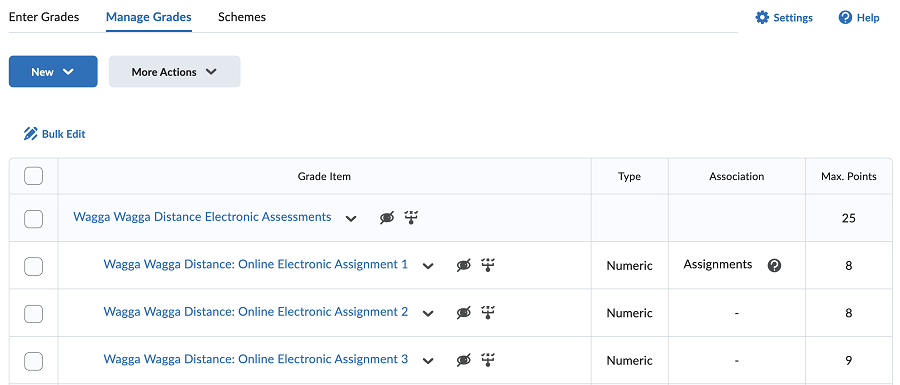
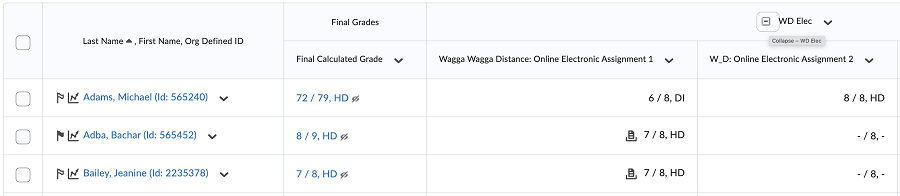
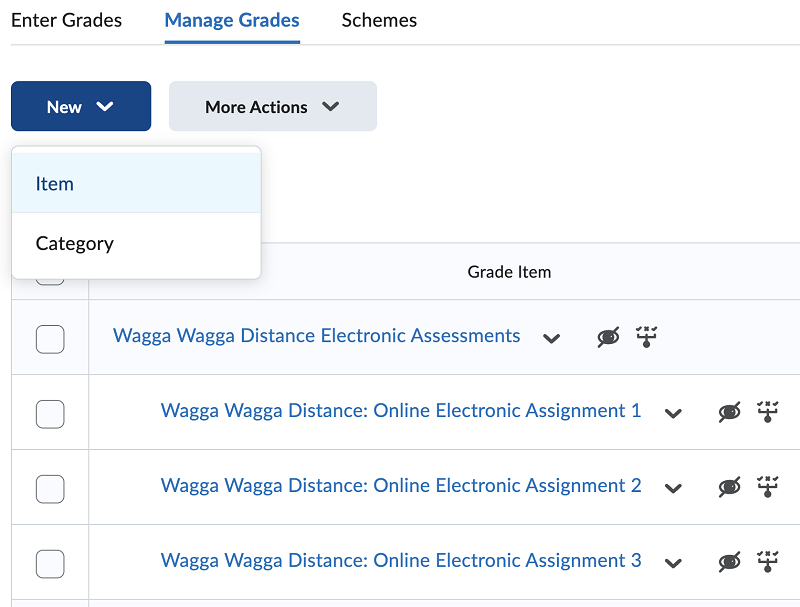
In the example above, “Online Electronic Assignment 1” has been linked to the relevant assignment, but the other two grade items have not yet been linked. Follow the steps in Finalise Assignments in Brightspace to apply grade settings within assignments, quizzes, or discussions and create the necessary links.
To check that all the necessary grade items are present in My Grades when the satisfactory grading scale is in use:
Where the satisfactory/unsatisfactory grading scale is used across the subject, each grade item should have a weighting of 1. The total should be the number of grade items, multiplied by the number of sections you are able to view.
For example, if there are four grade items and two sections, the weighting total should be 8. A student will only achieve a calculated grade of Satisfactory when a mark of 1 is allocated to each grade item in their section.
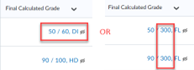
Grade items assessed under the normal grading scale (i.e. HD, DI, CR, etc) will have a points value corresponding to the percentage weighting for that grade item (e.g. an assignment worth 20% of the mark will have a points value of 20).
Weightings of grade items assessed under the normal grading scale should add up to 100. If normal grade items for more than one section are listed and your role in the site allows you to view more than one section, you will see a multiple of 100 for the number of sections. For example, if you can see normal grade items for 2 sections, the weighting total should be 200.
Weightings of grade items assessed under the satisfactory/unsatisfactory grading scale will have a weighting of 1. These items will not contribute to the final calculated grade. If it is necessary to award a Fail grade to a student who has not passed a satisfactory/unsatisfactory grade item (i.e. the item is a hurdle), an override will need to be entered for that student the Final Adjusted Grade column.
By default, a satisfactory/unsatisfactory grade item will have a value of 1 for Satisfactory and a value of 0 for unsatisfactory. Depending on the value assigned, SY or US will display in the grade column when the student receives their result.
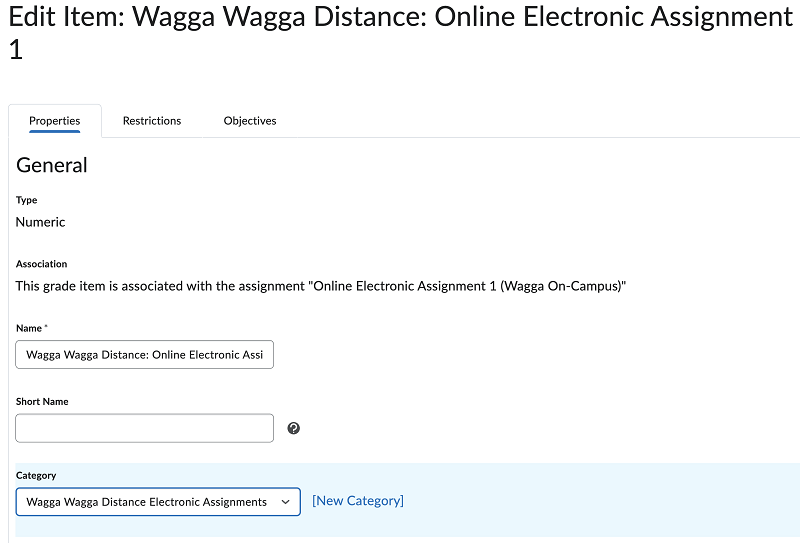
If you need to change this, click the drop-down menu next to the grade item in Manage Grades and click Edit. The Edit Item screen will open and the Properties tab will be open. In the Properties tab, scroll down to the Grading Scale menu and change the Brightspace grading scale from Competency to Threshold. The Threshold grading scale will deliver an SY grade where a student’s mark is above 50%. If you need the mark required for an SY grade to be different from 50%, go to the Schemes tab in My Grades. Click More Actions and Copy. Select Threshold and click Copy.
This will create a copy of the Threshold grade scale (called Copy of Threshold) within Subject Schemes. Click Copy of Threshold and enter a new Assigned Value % for the US grade. The correct value to use for a pass mark of 70% would be 69.99.
Enter a new Start % for the SY grade. The correct value to use for a pass mark of 70% would be 70.
Give your grading scale a custom name. You can now apply this grading scale to satisfactory/unsatisfactory grade items within the subject.
In the example above, “Online Electronic Assignment 1” has been linked to the relevant assignment, but the other two grade items have not yet been linked. Follow the steps in Finalise Assignments in Brightspace to apply grade settings within assignments, quizzes, or discussions and create the necessary links
In addition to these essential steps, several other features are available in the My Grades tool.
This article describes the options available to change the appearance of the Enter Grades table in My Grades. These can help to clarify and simplify the view presented.

The columns in the Enter Grades table will appear in the order you have selected.
When grade items have been added to categories (see Use categories to organise grade items under the Additional features section below).
The minimise/expand category icon only displays when viewing the Gradebook in Standard View and only when the category has values/content/grades assigned to it.
Collapsing a category simplifies the table by removing the individual grade item columns.
The category will open, and individual grade item columns will appear in the table view.
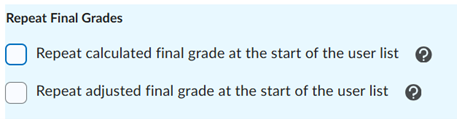
The calculated grade will be removed at the beginning of each row in the table.
 Click Apply.
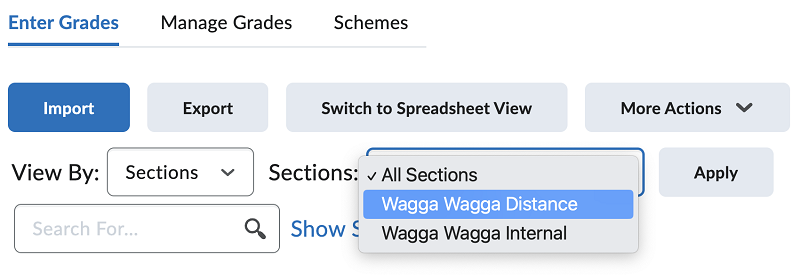
The table will be filtered by the section or group.
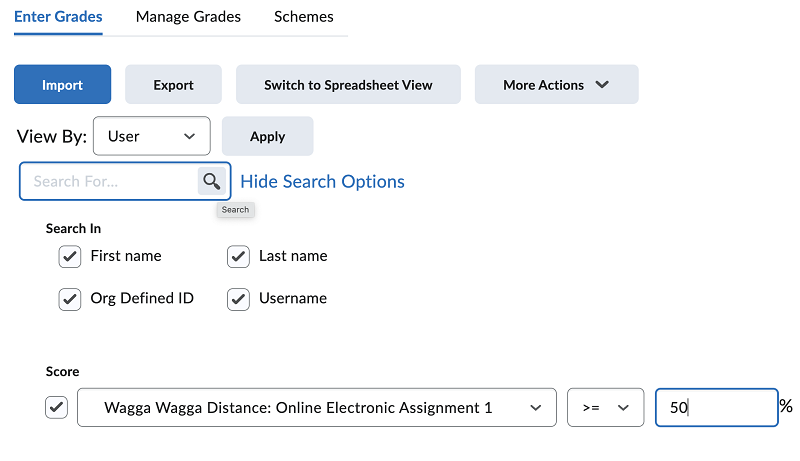 Students with marks within the given range for the grade item selected will be listed.
Hiding a column in the table does not have the effect of hiding the grade item or category from students. To hide a grade item from students, see Hide Grade Items from Students below.
The columns will be hidden from the table.
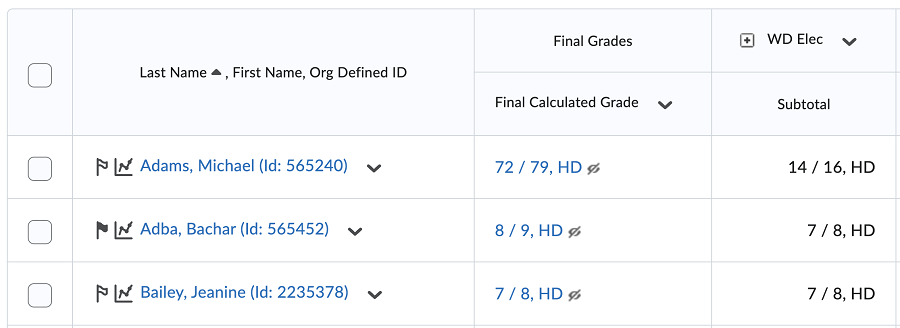
Categories can be used to group and organise grade items in My Grades. Adding categories helps users to quickly identify the activity types and cohorts that grade items relate to. It also creates an automatic sub-total of students’ marks for the category.
![Screen capture image of the Manage Grades tab in My Grades, with a drop-down menu labelled New. The New menu contains an option called Category which has been highlighted.]](https://cdn.csu.edu.au/__data/assets/image/0006/4286751/NewCategoryManageGrades.png)
![Screen capture image of the New Category screen in My Grades. There is a text entry field for Name and another text entry field for Short Name. The screen gives the ability to add a description to the category and there are check-boxes for grading settings.]](https://cdn.csu.edu.au/__data/assets/image/0004/4286758/NewCategory.png)
Tip: If the category has a long name, adding a short name helps to make the table in Enter Grades easier to read.
Using short names helps to quickly identify the category in the Enter Grades table, as the short name appears in the table header for the category.Academics should leave the "Can Exceed" and "Bonus" checkboxes unchecked. Enabling these can complicate grade transfers and may not align with standard criterion-based assessment practices where grades are typically capped at the maximum possible points for an assessment task.
This ensures that any grade items added to the category count towards the calculated grade and retain their existing weighting value.
![Screen capture image of the New Category restrictions tab in My Grades. The tab gives the option to hide the category from users, to add start and end dates and times, and to attach an existing release condition to the category or create a new one.]](https://cdn.csu.edu.au/__data/assets/image/0005/4286759/NewCategoryRestrictions.png)
Tip: A cohort of students (for example, “Bathurst Distance”) is known as a section in Brightspace.
The category you have created will appear in the Manage Grades tab. If you have applied a release condition to the category, the release conditions icon will appear. The category will only be visible to users who meet the release conditions.
The grade item will be added to the category.
Grade items may be added to categories in bulk. This is done by clicking on the Bulk Edit icon above the table in Manage Grades.
In some circumstances, it may be necessary to manually edit or create a grade item so that My Grades exactly matches the information in the Subject Outline.
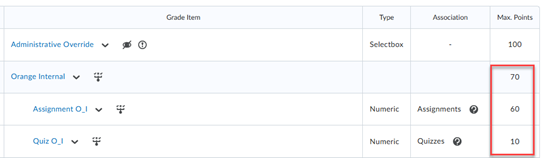
For example, the Subject Outline may have a single entry called “Quizzes” for 5 quizzes with a total weighting of 5%.
In this case, it would be necessary to create a grade item manually for each quiz. It would also be necessary to delete the grade item called Quizzes with a weighting of 5% automatically generated from the subject outline.
If you add a grade item for comments it will be visible to students unless you hide the column. Please refer to the information below on hiding grade items.
Academics should leave the "Can Exceed" and "Bonus" checkboxes unchecked. Enabling these can complicate grade transfers and may not align with standard criterion-based assessment practices where grades are typically capped at the maximum possible points for an assessment task.
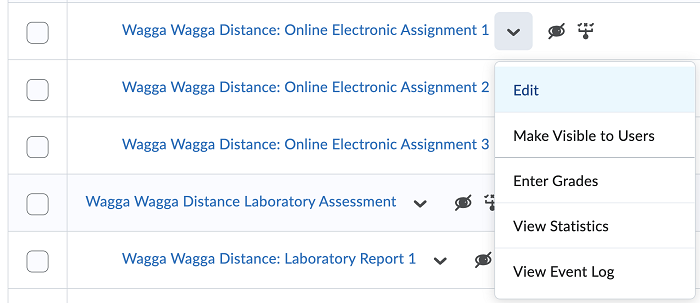
To edit an existing item, click the drop-down menu using the arrow to the right of the grade item name in Manage Grades, and select Edit.
Follow steps 3 – 8 above.
Brightspace allows you to flag the information about a student in the Enter Grades tab for another staff user to review.
You can also send an email to students based on selections you make or a search you carry out in the Enter Grades tab.
The flag icon for that row will show as shaded. In other rows, the icon will be unshaded.
This row in the table will be flagged for other staff users.
Students with a flag will be listed.
The email will be sent.
You can hide grade items and categories in the Manage Grades tab. For a mark not to be visible to students in My Grades, both the grade item and any category the grade item belongs to must be hidden.
Note: If you are using the Grade Moderation Tool, do not hide the category. For more information on this, please see Grade Moderation - Enhanced.
However, the mark and any feedback will still be visible to students in the assignment, quiz, or discussion associated with a grade item, unless the assignment, quiz, or discussion is also hidden.
Accordingly, if you are not ready to release a mark to students, we normally recommend using Save Draft when marking in the Assignments, Quizzes, or Discussions tools.
An assignment mark can be published to My Grades without releasing the mark and feedback to students. See Finalise Assignments.
It is not currently possible to publish marks to My Grades from a quiz or discussion without releasing the marks and feedback to students, unless the quiz or discussion is also hidden.
Marks should be entered via Brightspace’s assessment tools, such as Assignments, whenever possible, so the mark is clearly associated with the assessable activity.
The Enter Grades tab can be used to enter marks directly when there is no assignment, quiz, or discussion associated with a grade item. Enter Grades can also be used to adjust the final grade manually.
The mark or grade will be added.
The marks or grades will be added.
Marks directly entered in My Grades will be visible to students unless both the grade item and any category the grade item belongs to are hidden.
When finalising the gradebook, there are three main things you should check:
If an assessment type is displayed in the Association column, this indicates that an assessment of that type has been linked.
Click on the (?) icon to show which assessment this has been linked to.

Grade items that have been provisioned from subject outline will automatically have the release condition applied.
This check is for grade items that may have been manually added.
For more information about setting up grades in the Gradebook, refer to Set up My Grades - Setting up My Grades above.
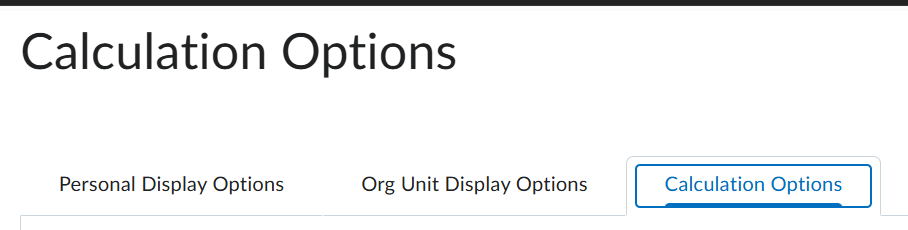
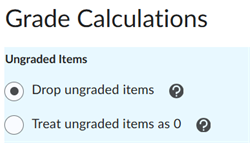
The Calculation Treatment for Ungraded Items setting determines how ungraded items are handled in the gradebook. This is important as student grades need to be out of a total of 100 in order for grades to transfer correctly at the end of session. There are two options:
| ‘Drop Ungraded Items’ | ‘Treat Ungraded Items as 0’ |
|---|---|
| This is the default setting. This setting should be used for gradebooks with multiple cohorts where the assessment total is more than 100. | This setting should be used for gradebooks with a single cohort or multiple cohorts where the assessment are combined and the assessment total is exactly 100. |
To change this setting:
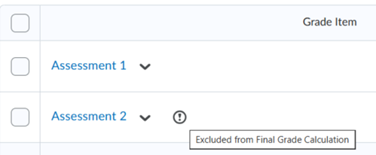
In cases where you have an assessment that does not contribute to the final grade, you will need to exclude it from the calculation.
You may simply not link the assessment to a grade item. However, if you wish to link it to have it displayed in the gradebook, you can exclude it by editing the grade item and checking the ‘Exclude from Final Calculated Grade’ option.
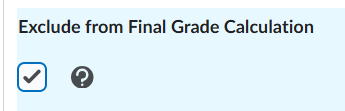
You can see that a grade item has been excluded by an icon via the ‘Manage Grades’ tab.
When a subject is provisioned, it will be created with a scheme that reflects the Grade Mode in CDAP and Banner.
Therefore, if you wish to alter this you will need to have CDAP amended before attempting to transfer of final grades, otherwise it will error and fail. For more information and resources for CDAP refer to CDAP Training Resources.
The final adjusted grade column is only used if you wish to display an altered Grade along with the revised score.
This is currently used for Hurdle assessments and can be used for moderation.
Otherwise, it can be left blank.
The numeric grades are displayed due to the set up of the scheme. These will not affect the actual grade as the final grade looks for the symbol only.
However, to remove this from view:
The Grade Finalisation Tool will compare the class list from Brightspace and Banner and take the Banner class list as the authority, therefore these students can be left blank in gradebook.
The Grade Finalisation Tool will return a ‘Grade not provided’ validation error message against the student upon load, this can be ignored.
Both the Final Calculated Grade and the Final Adjusted Grade have been hidden from the students view via an administrative system setting that cannot be altered by users.
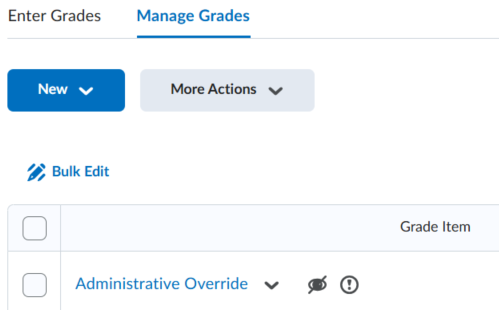
The Admin Override column is set as ‘Hide from Users’ on provisioning, however this may be altered by users. Therefore, you must ensure that is not altered.
You can determine if it is hidden from student view by the Hidden icon which will display in the Manage Grades tab.
This page may be updated at any time. If you print it, you could miss future changes. Please check this page regularly for the latest updates.