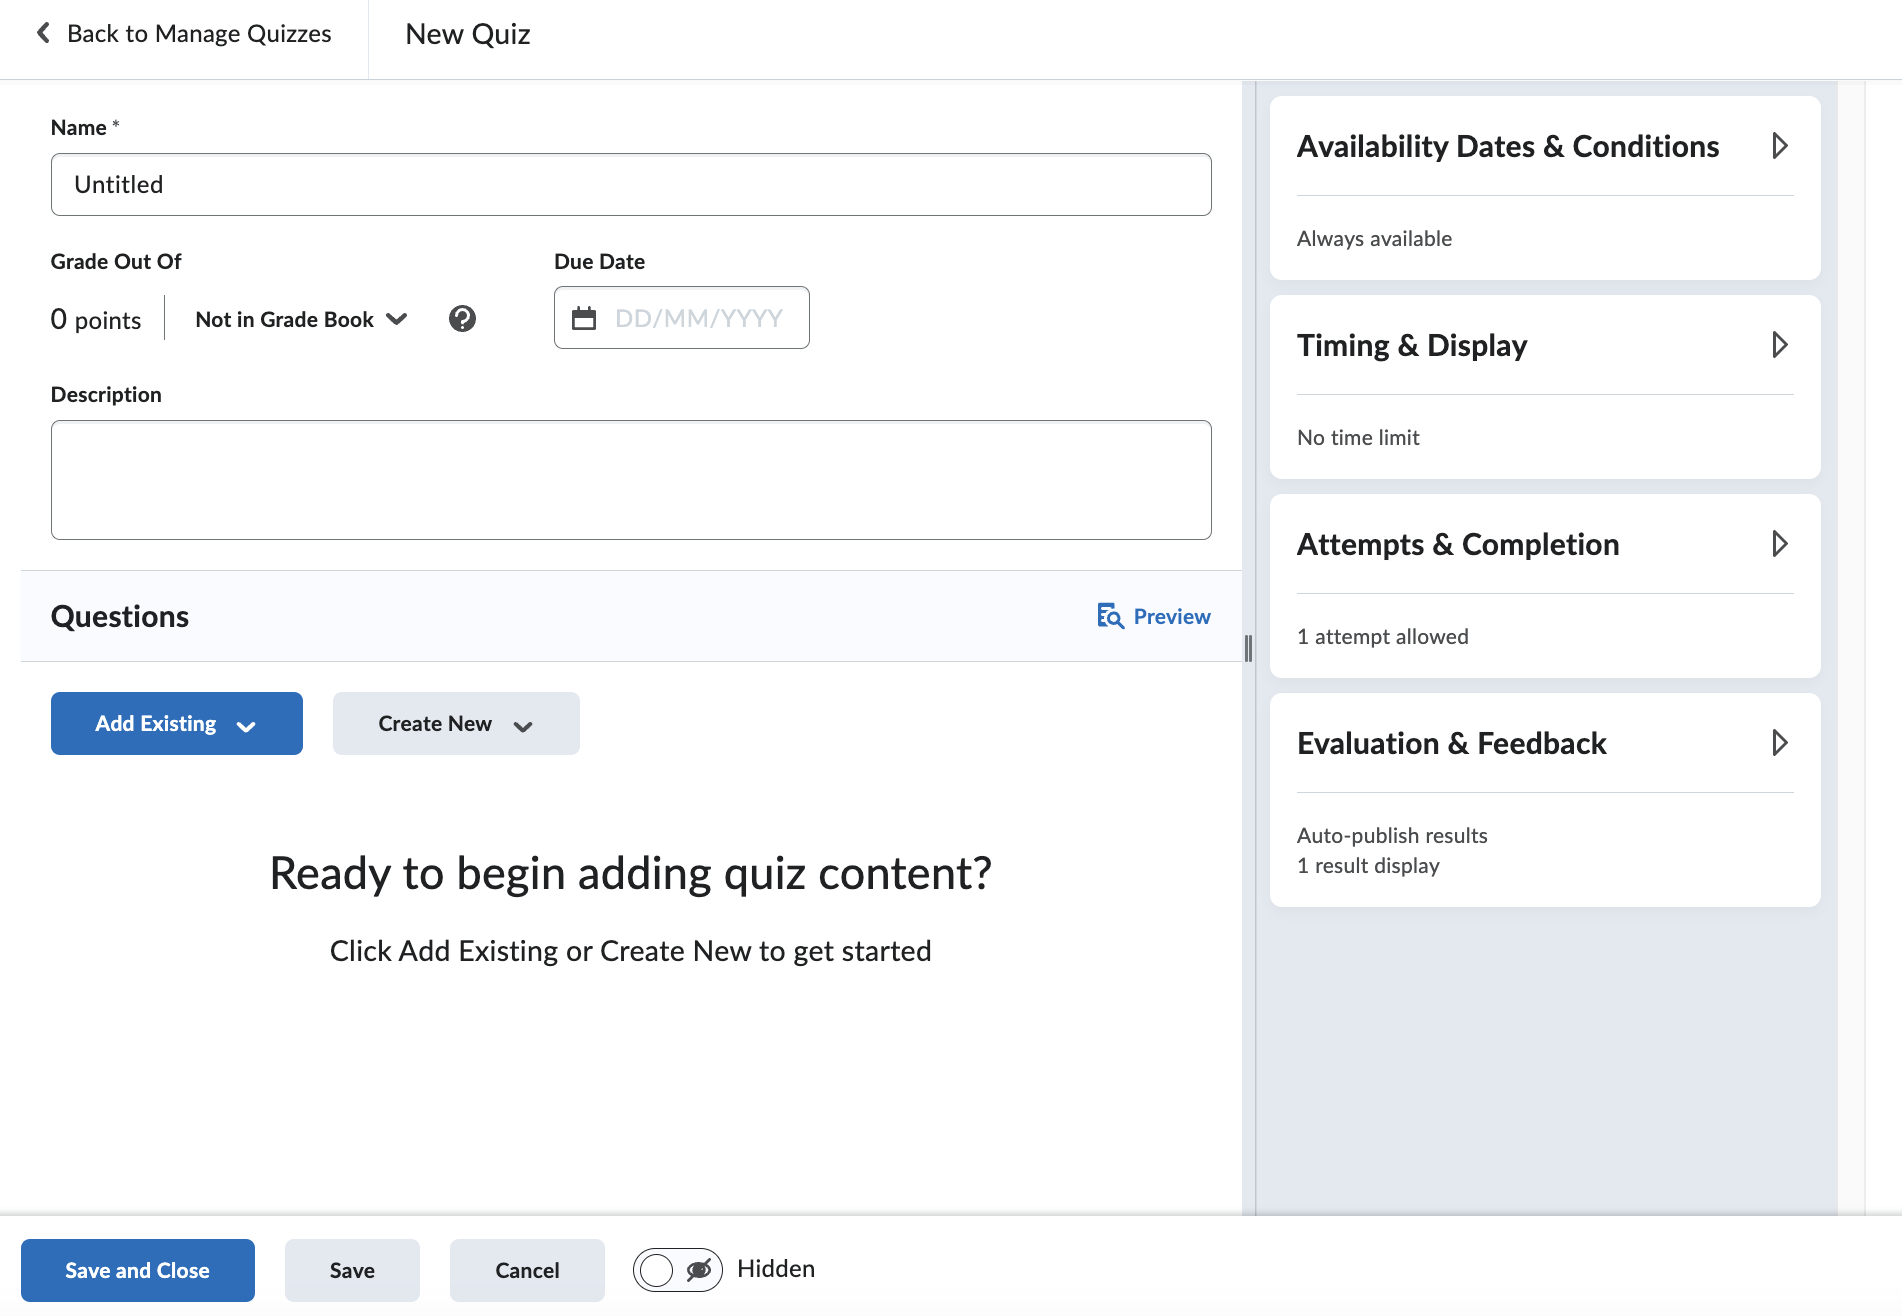
The Quiz tool in Brightspace is a versatile assessment feature designed to engage students with interactive quizzes. It offers various question types, customisable settings, question pools, the ability to shuffle the order of questions, and the option of automated grading for some question types.
The Quiz tool is beneficial for both students and staff with features like automated grading and immediate feedback, as well as the ability to track student progress. These give the option for formative self-assessments, as well as graded summative assessments for students.
This article guides you through the steps required to create a quiz and introduces you to the configuration options that are available.
At Charles Sturt we use master and subject sites to prepare our subjects. Master sites allow you to set up a quiz, which is then copied to your subject site. We recommend setting up quizzes first in master sites. It can save time to do this, as your quiz is then copied automatically to the subject site each time the subject is taught.
Creating and managing quizzes can be a complex task! If you want to discuss your needs and get support from an Educational Designer, please Log a Service Request.

![Screenshot showing the Manage Quizzes dashboard]](https://cdn.csu.edu.au/__data/assets/image/0006/4289694/ManageQuizDashboard.png)
Clicking Edit Categories allows you to create quiz categories, to help you organise your quizzes into related groups. If you cannot see your categories in the table, change the View: By Availability filter to By Category.
It is recommended that you leave the Due Date, Start Date and End Date blank if you are working in the Master Site and add them in the Subject Site prior to the commencement of teaching.
While you can adjust availability dates and conditions settings in this section, it is easy to adjust dates in bulk using the Manage Dates function which is accessible through the Subject Admin menu.
You can click Save at any time and then continue working on the quiz. There is no autosave feature in the quiz creator, so we recommend that you save regularly.
You can customise several timing and display settings for quizzes. These include:
Click the drop-down to the right of Timing & Display to access the options.
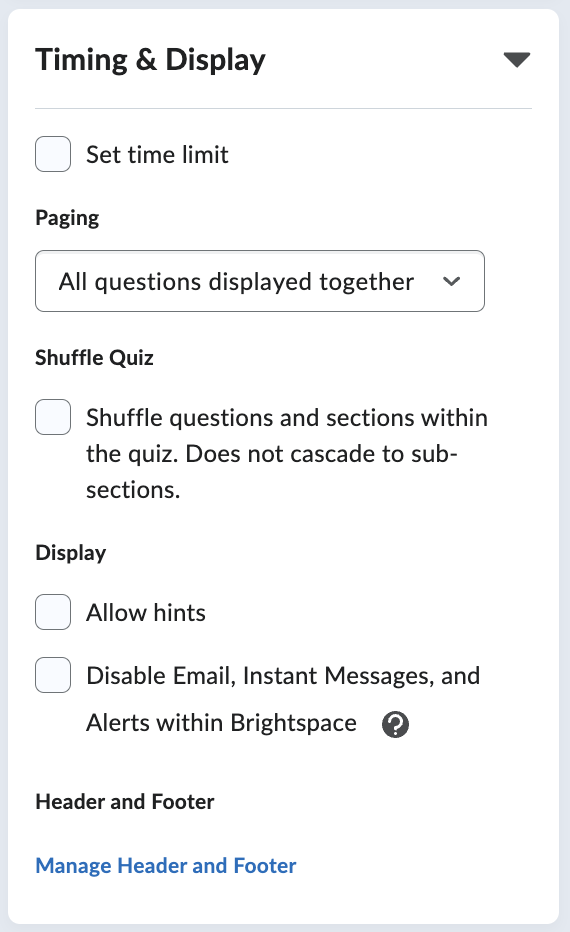
To set a time limit for students to complete the quiz, select the Set time limit option and then adjust the following:
By default, the quiz timer is set to Asynchronous, which means the quiz timer begins when the student launches the quiz and the quiz is submitted automatically at the end of the allocated time. You can also set the quiz to Synchronous, which means the timer begins at the start date and time set for the quiz, and the quiz is submitted automatically at the end of the allocated time, irrespective of when the student attempt began.
You can also set how many questions to display to a student on each page. Consider your context and adjust the number of questions accordingly.
If a low number of questions is displayed per page, the student will need to change pages more often. This can be an issue in a low bandwidth setting. Conversely, if too many questions appear on a page, it may take a long time for students to read and absorb the content, and students sitting near one another will have more opportunity to collude. The most popular option is generally ‘5 questions per page’.
To set the paging options, click the drop-down below the Paging option and select how many questions you want to display per page.

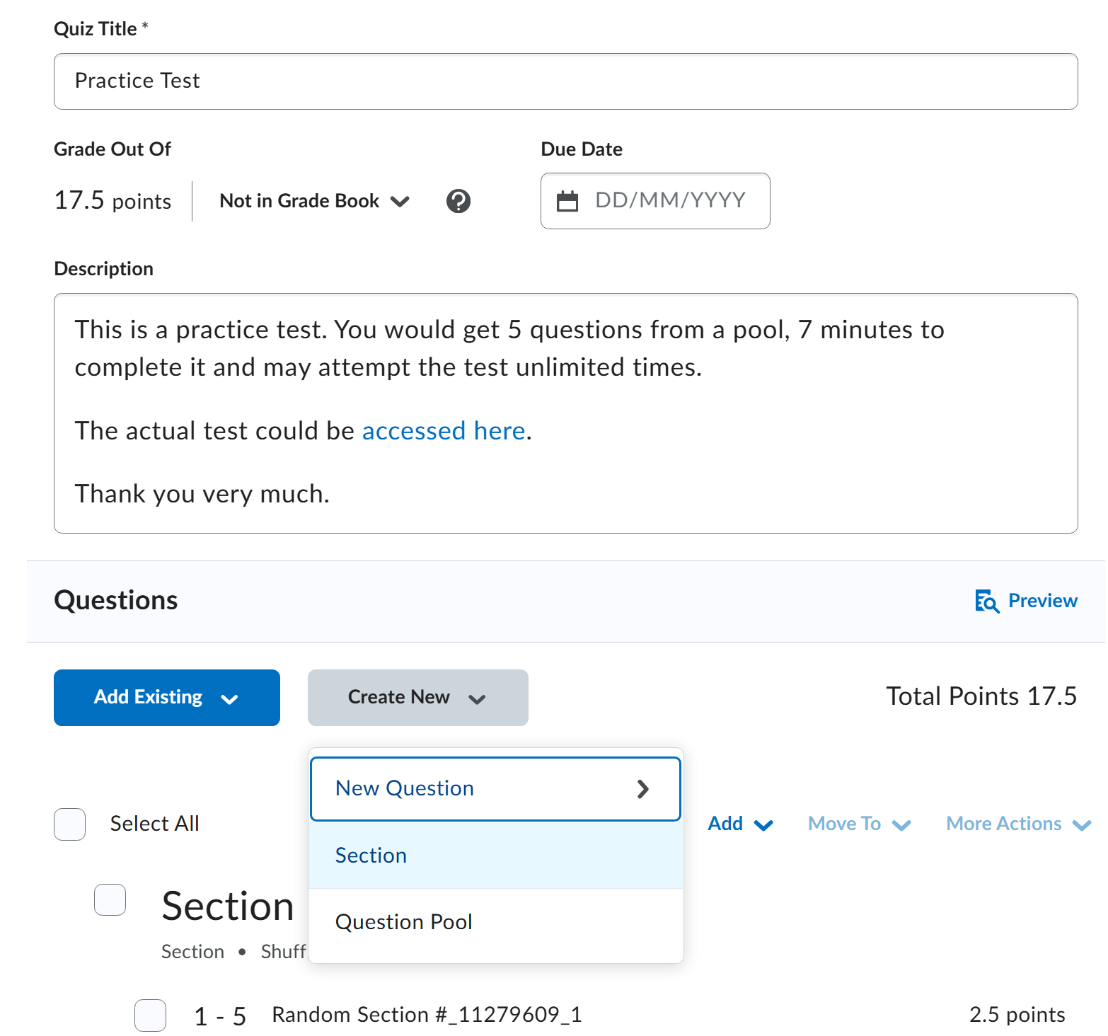
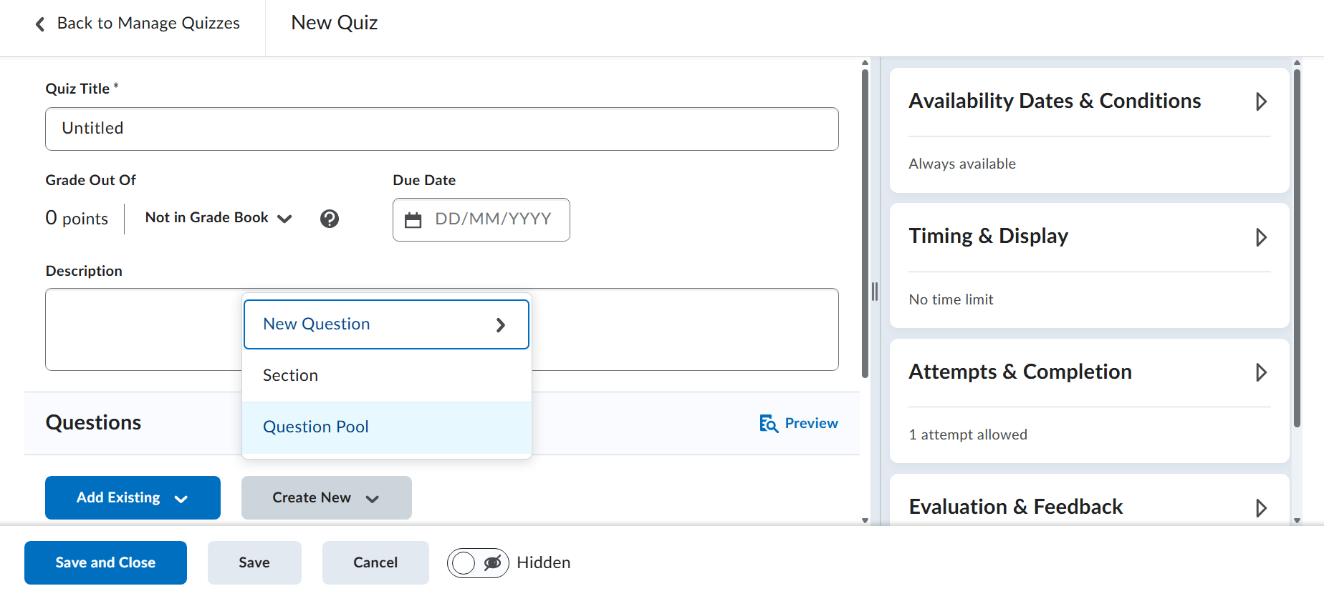
You can customise where you use page breaks by organising your quiz into sections and selecting Add page break after each section in the Paging field. To create a section, click on the Create New button in the New/Edit Quiz screen and select Section.
There are three types of randomisation possible:
To shuffle question order, check or uncheck question/section shuffling, as desired.
For information about how to draw questions randomly from a question pool, see Create a new question pool below
Quizzes with randomised questions can help to address academic integrity issues, such as collusion and copying, but this feature should be used thoughtfully, as it can also result in equity issues in test or exam-like conditions.
If you have concerns about shuffling questions, you can Log a Service Request to seek advice from an Educational Designer.
You can change the quiz settings to determine how many attempts students can submit, and how their marks are calculated.
Brightspace allows you to set the number of attempts allowed for the quiz, and which attempts should be considered when determining the mark.


The Evaluation and Feedback settings allow you to determine when marks and feedback associated with the quiz will be available to students.
 Auto-publish attempt results immediately upon completion will mean that marks and feedback are immediately visible to students. Where a quiz carries assessment weighting, the marks will be transferred to My Grades. This option should only be used with authorisation from the subject convenor or subject co-ordinator in a case where the attempt does not require manual marking or moderation.
When you create or edit written response questions, click "Add Rubric" to attach a new or existing rubric. Within the quiz, you can use the rubric to grade written response quiz questions. The rubric will appear below the answer or you can click Pop out to open the response in a new window.

For more information on creating rubrics see, Create rubrics.
You can further customise the student view of the quiz results if desired via Customize Quiz Results Displays. This can be done in a staged manner, such as the ability to display quiz marks immediately upon submission and question feedback later.
Question pools allow you to attach the same set of questions to multiple quizzes. Multiple question pools can be used at once, allowing a quiz to draw from multiple sets of questions with different difficulty levels.
A set number of questions can be drawn randomly from a pool, allowing for randomisation of the questions a student answers in an attempt.
Using question pools in combination with the question library in the Brightspace site also helps you to efficiently update questions across quizzes.
Brightspace question pools can only be created from within the Quiz Creator dialogue.
During the creation and editing of a quiz, you can click Preview to view the quiz.
If you can enter a number that matches the number of questions in the pool, there will be no randomisation. However, if you a number which is lower than the number in the pool, the questions in the pool will be randomised.
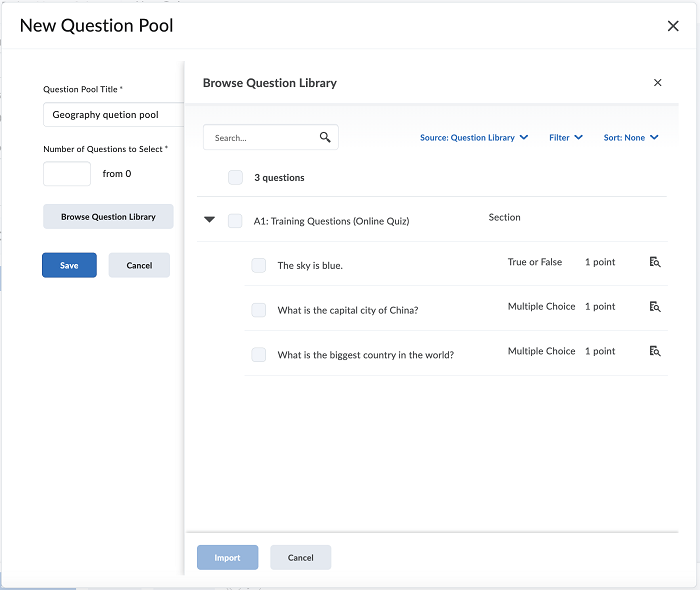
You are now ready to populate the question pool with questions. Click the heading below to learn how.
You can individually preview the questions by clicking the page/magnifying glass icon on the right.
![Screenshot showing the available questions within a section in the Question Library]](https://cdn.csu.edu.au/__data/assets/image/0004/4289755/ImportQuestionPool.png)

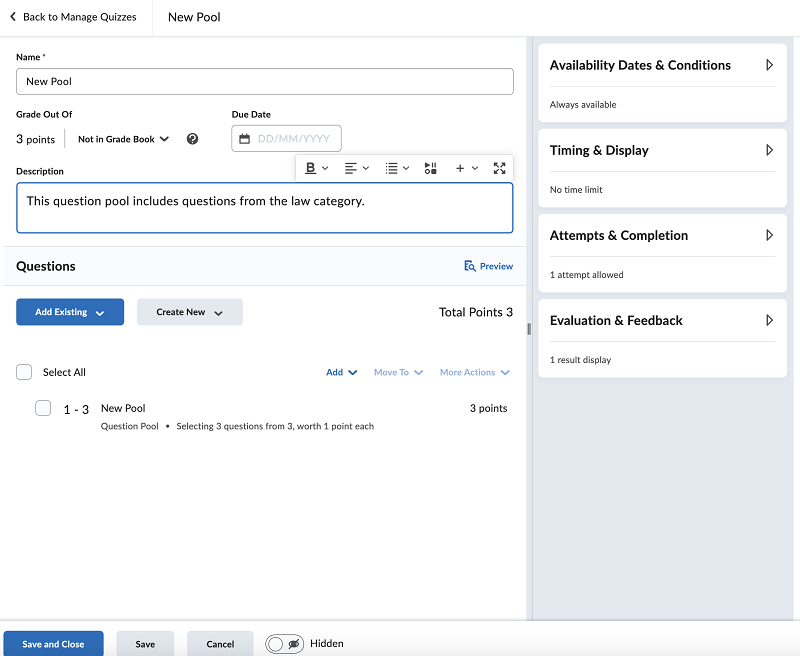
You will now be returned to the new quiz creation screen, with the question pool now visible in the Quiz Questions area.
Read Create a new question pool above for tips on setting the number of questions within a pool.
When you have finished adding the questions and configuring them, click Save and Close to return to the Manage Quizzes main screen.
You can edit the quiz from this point whenever required, utilising the Preview feature to experience the quiz as a student.
Once you have completed the above steps, the quiz setup is complete, and you can finalise quiz in subject sites. These subject sites are snapshots of the master site, and the master site remains unaffected. It functions similar to a template. This means that you can create duplicate versions of the quiz for different purposes, requiring only minor adjustments to prepare the quiz for students.
To finalise your quiz, you will need the following information:
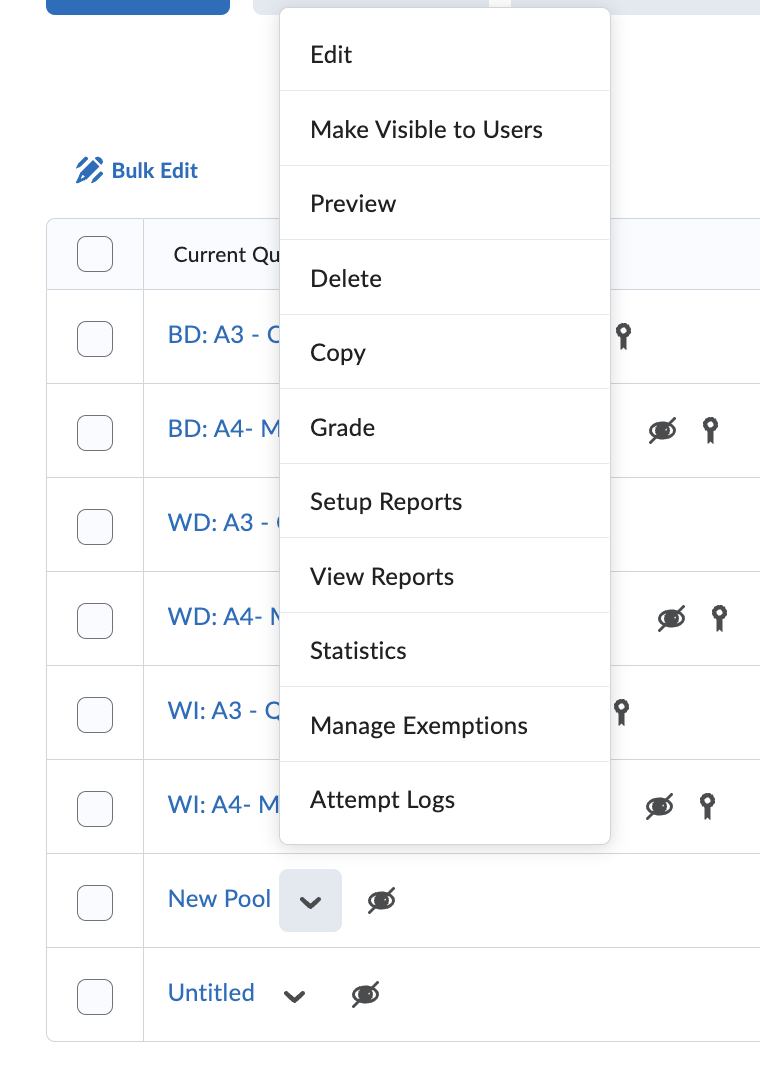
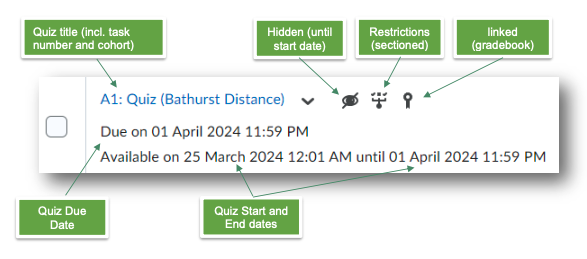
When you open the Manage Quizzes screen, you will note several icons alongside your Quiz title, as well as the release information underneath. These icons provide useful information about the setup of the quiz.
![]()
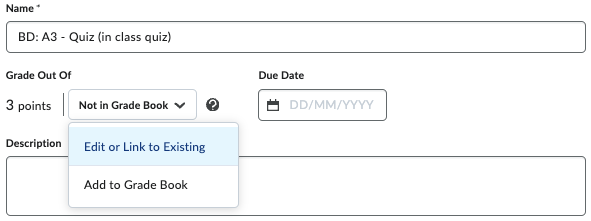
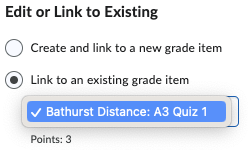
You will now see the Quiz creator (settings page), with In Grade Book now visible next to the points value for the quiz. If the percentage weighting of the quiz is different to the total points value, Brightspace will automatically convert a mark assigned to a quiz attempt when the mark is published to My Grades.
Within the Due Date field, enter the date and time required as per the subject outline.

Adding dates and times to the due date field communicates the due date to students. The availability dates (see below) determine when the quiz is available for students to attempt.
Students will still be able to attempt a quiz after the due date while it is still available to them. If this happens, Brightspace will flag the attempt as late.
Setting availability dates and times allows you to determine the period during which students will be able to see and submit a quiz.

A common scenario is to set the start date one week prior to the due date, which means students would have a week to access the quiz.
For students to be able to take the quiz, ensure you select Make Visible to Users under the drop-down next to the quiz you are working with in the Manage Quizzes main screen.

Cohorts are known as sections within Brightspace.
Your quiz setup is now complete.
This page may be updated at any time. If you print it, you could miss future changes. Please check this page regularly for the latest updates.