In Brightspace, the following quiz question types are automatically marked:
The mark allocated to an auto-marked quiz question response may be manually amended.
Written response questions will need to be manually marked. This article will guide you through manually marking written response questions and publishing the results to the students.
When you are setting up any quiz that has manually marked questions, the quiz settings in the Evaluation and Feedback section should have the auto-publish attempt results immediately upon completion unchecked. For more information about the settings for Quizzes, see Create and Manage Quizzes.
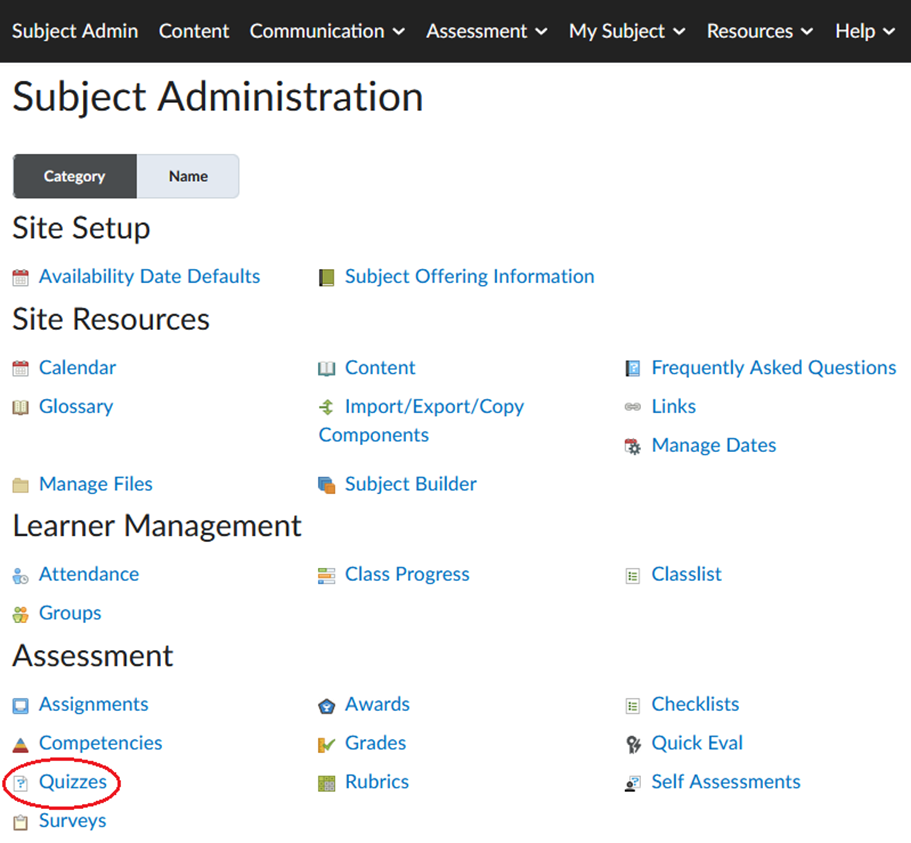
Manage Quizzes is where you can monitor, edit, and mark quizzes. In your Subject session site, open Manage Quizzes from the subject navigation through either the Assessment or Subject Admin menu options.
Accessing via the Assessment tab:

Accessing via the Subject Admin screen:
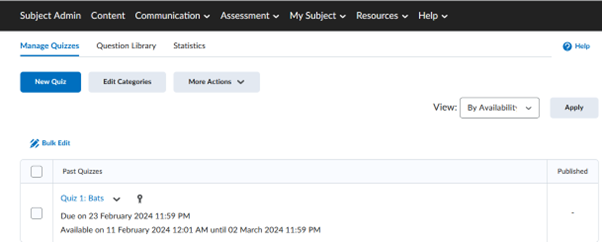
The Quizzes tool main screen will appear. When you enter the screen, the Manage Quizzes tab will be open.
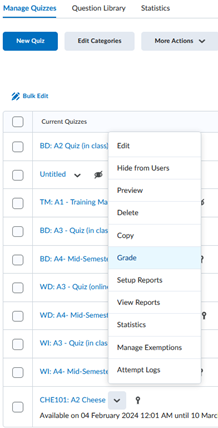
Click on the drop-down menu next to the name of the quiz you want to mark and select the Grade option.
You will now be on the Grade Quiz screen.
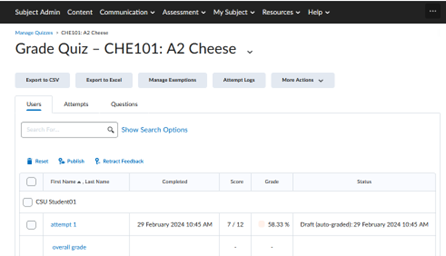
The Grade quiz screen gives you three ways to view and access the quiz submissions:

![]()
If you have chosen to access and mark through the Users or Attempts options, select the student’s quiz attempt you want to mark. This will take you to a summary of the attempt.

To mark a quiz:

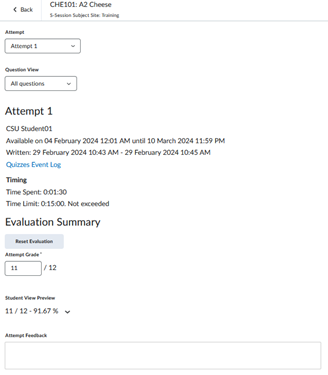
This must be clicked before moving onto the next student/attempt or the mark and feedback will not be saved.

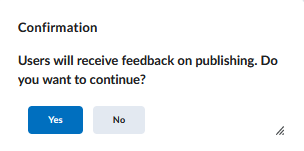
Clicking Publish will immediately release the mark and feedback to students, unless the quiz is hidden. This option should only be used with authorisation from the subject convenor or subject co-ordinator, once any necessary moderation has taken place. See Publish quiz marks below.
If the student has made more than one attempt, you can move between them by clicking the Attempt drop-down menu at the top of the page and choosing the next attempt you want to mark. Remember to save your marks for the current attempt before moving to another.
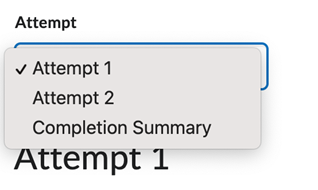
Marking more than one attempt will require more time and effort for markers, but may have benefits in terms of student learning, progress monitoring, and fairness in assessment. It is recommended to only mark more than one attempt if you have a defined learning strategy and goal in mind. To learn more about how Brightspace calculates marks from multiple attempts, see Configure attempts and completion settings in Create and manage quizzes.
To move between students when marking, you can use the Previous and Next buttons. The Back link returns to the Grade Quiz summary page.

From the Questions tab, there are two marking options:
To mark individual responses:
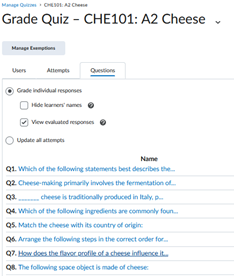
You will see the students’ answers to the question on the next page and you will be able to assign an individual mark and feedback to each answer. If a student has answered the question more than once, each answer will be shown separately. You can change the total number of answers displayed at one time using the drop-down menu at the top of the screen.
To learn more about how Brightspace calculates marks from multiple attempts, see Configure attempts and completion settings in Create and manage quizzes.
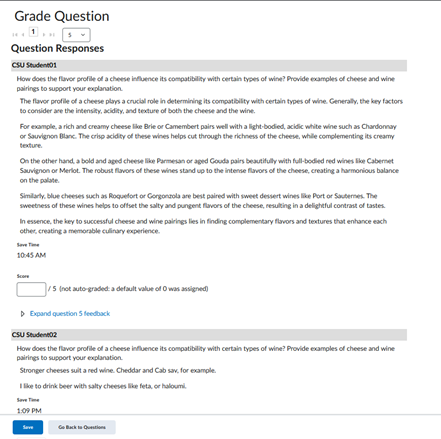
You can turn on anonymous marking by choosing Hide learners’ names, so student information is not visible alongside responses and responses are shuffled. View evaluated responses will include previously marked responses.
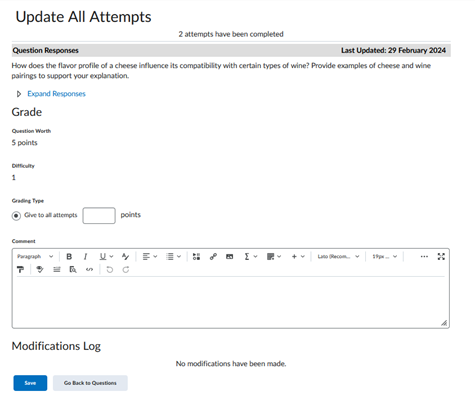
For Update all attempts:
You can also access the Grade Quiz screen via Quick Eval in Subject Admin.
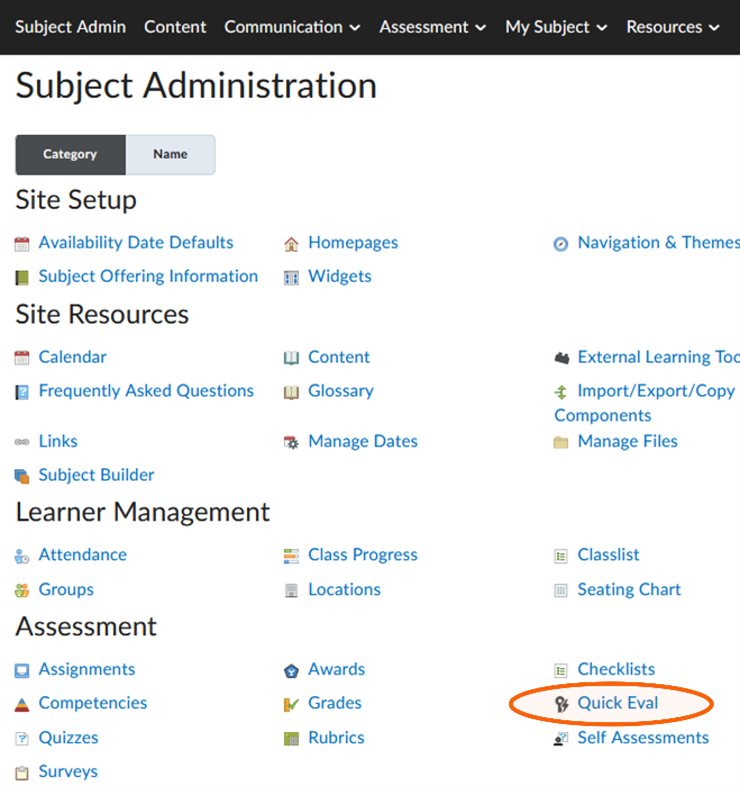
The Quick Eval page will appear.

Quick Eval provides an overview of all submissions in the Quizzes, Assignments, and Discussions tools requiring marking. Quick Eval has two tabs: Submissions and Activities.
The Submissions tab shows a list of all submissions, including quiz attempts, requiring marking. Clicking an individual attempt allows you to view that attempt in the Quizzes tool and enter a mark and feedback.
The Activities tab provides a dashboard view of submissions requiring marking, grouped by assessment item. For each assessment item, three measures are shown: Completed (the number of submissions made by students), Evaluated (the number of submissions that have been marked), and Published (the number of submissions that have been marked and published to My Grades).
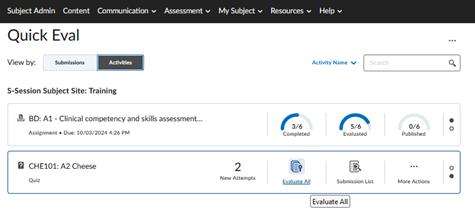
To enter the Quizzes, Assignments, or Discussions tools and mark all submissions for an assessment item, find the row in which that item is listed, hover over Completed, and click Evaluate All.
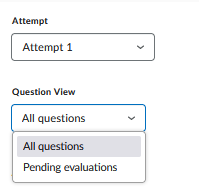
If students have made multiple attempts, you can switch between them in the attempt drop-down menu. You can choose to view all questions, or only those with pending evaluations.
You can alter the mark and provide feedback for the question.

Click Save Draft. You can use the Previous and Next buttons to move to the next student. The Back link returns to the Quick Eval summary screen.
Click Publish to release the marks and feedback to the student, and send them to My Grades (for a quiz with assessment weighting).
This option should only be used with authorisation from the subject convenor or subject coordinator in a case where the attempt does not require moderation. See Publish quiz marks below.
When you manually mark a quiz question you will save a draft of the mark and any feedback provided. This is not automatically released to students.
This assumes that the Evaluation and Feedback settings have the auto-publish attempt results immediately upon completion unchecked to avoid releasing the marks to the students until manually marked questions have been marked. For more information about settings for Quizzes visit Create and Manage Quizzes.
To publish quiz marks and feedback to students, follow the steps below. This should normally be done after all quizzes have been marked and moderation taken place with authorisation from the subject convenor or subject coordinator. Once the marks are published, these will be visible to students, unless the quiz has been hidden.
Access the Manage Quizzes screen: Click Assessment in the nav bar, choose Quizzes & Exams. Click on the drop-down menu next to the name of the quiz you want to mark and select the Grade option. The Grade Quiz screen will appear.
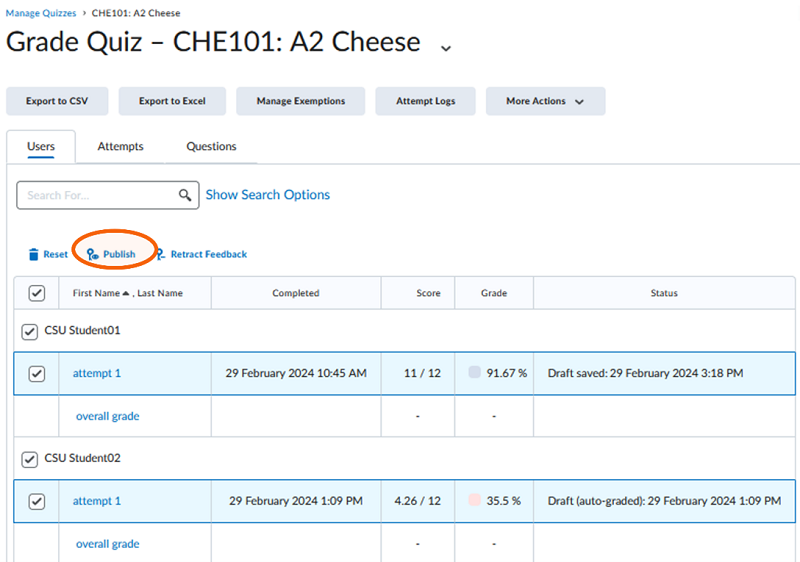
You can also release the marks and feedback for all students on the Quick Eval page. Click on More Actions and choose Publish All.
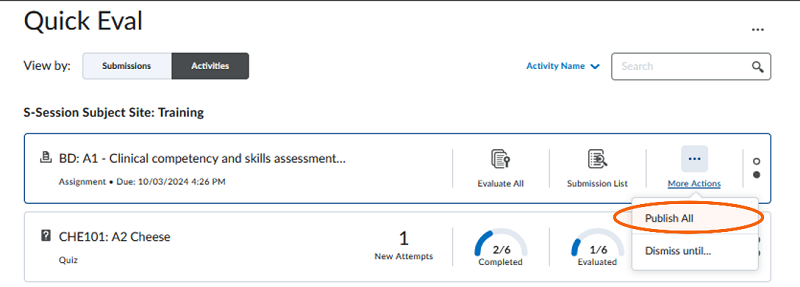
You can also publish the marks and feedback for all students in Quick Eval. Go to Subject Admin in the navigation bar, and click Quick Eval. Find the row that relates to your assessment item, Click on More Actions and choose Publish All.
This page may be updated at any time. If you print it, you could miss future changes. Please check this page regularly for the latest updates.