Now searching for:
The intelligent agents tool allows you to set up automated processes, called intelligent agents, which monitor activity in your Brightspace subject against criteria that you select and can automatically generate a customisable email to the student and/or to other roles and individuals in your subject site. This may help students with timely interventions and access to support mechanisms and may assist with student retention strategies. Monitoring activity levels in the subject such as logins, submission, participation in discussions, and marks achieved in quizzes may to help identify students who may need additional support or intervention.
Some common situations using an intelligent agent may include contacting students who
When developing intelligent agents, it is essential to plan them in conjunction with your subject's communication strategy so that students are not overwhelmed with too many emails or receive multiple messages about the same information. Take into consideration the volume and importance of the communiques being sent, as well as any school or faculty guidelines.
Under the Course Retention strategy, students who do not access the LMS in the early weeks of a teaching period may receive a single communication at the course level. We recommend checking school or faculty guidelines before contacting these students about their LMS use.
Creating intelligent agents that provide helpful guidance for you and your students can be a complex task! If you are interested in discussing your needs and getting support from an Educational Designer, please Log a Service Request.
Creating an intelligent agent involves four steps:
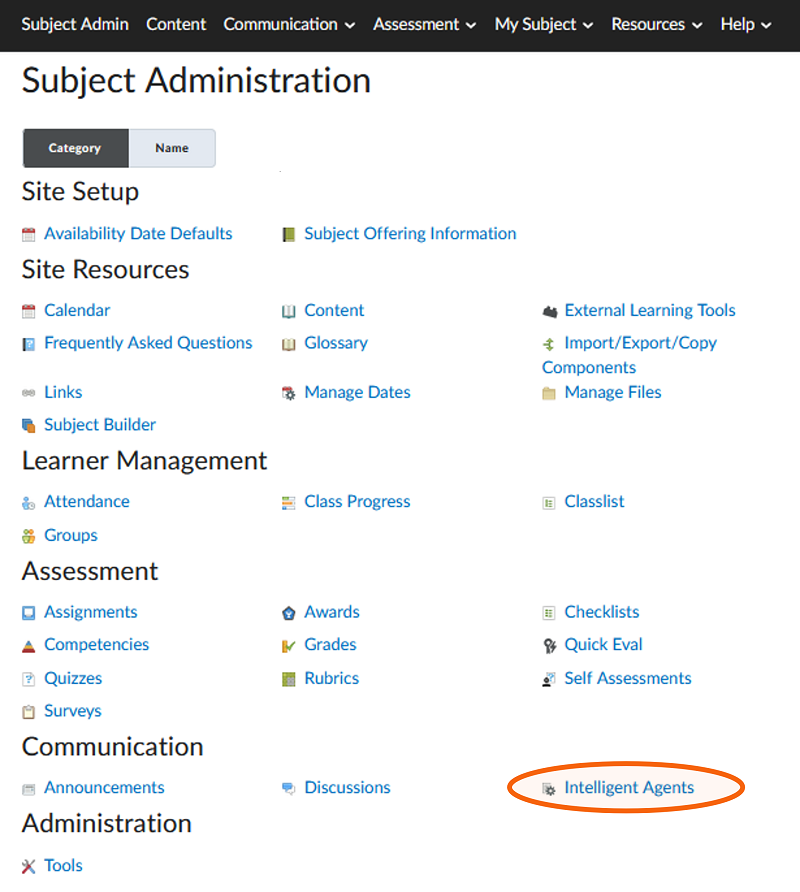
The intelligent agents tool can be accessed from the navigation bar in your subject site.
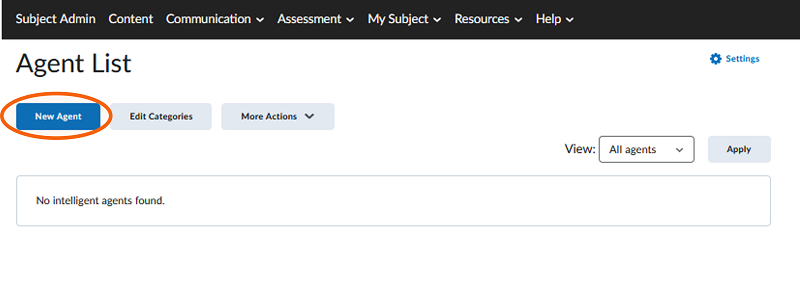
To create and name an intelligent agent:
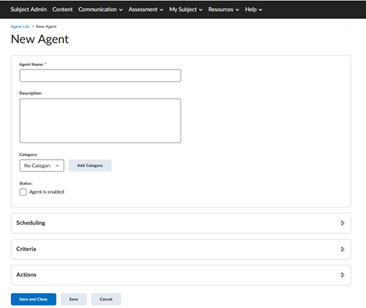
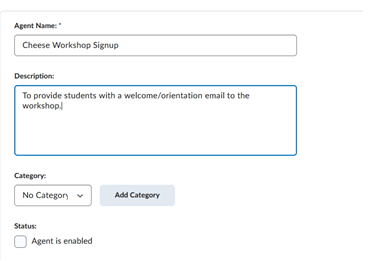
You can add and assign categories to agents. Categories may be useful if you create multiple agents as it allows you to group and organise them.
If you would like the agent to be active upon creation, click the agent is enabled box. You can also enable the agent on the Agent List screen.
We recommend not having the agent enabled on creation so you can review it and test it before it is released to students.
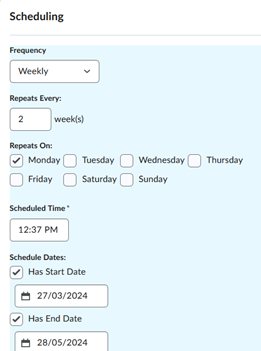
If you want to set your intelligent agent to run automatically you can select an option from the frequency drop down menu.
Decide how often you want your agent to run:
Once you have chosen the frequency, you can select scheduled times, date ranges (Start/End Dates), time of day (Scheduled Time), and how often the intelligent agent repeats (Repeats Every).
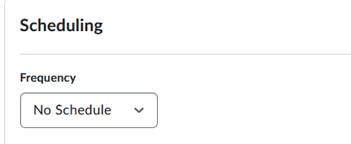
If the no schedule option is selected, you will need to manually run the intelligent agent from the Agent List screen. This is explained later in this guide.
In the criteria section, choose which roles the intelligent agent applies.
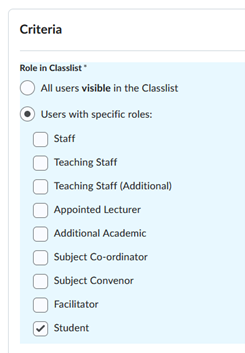
Then, identify the criteria that will be applied to those users. There are three main options:
We recommend that students are not sent emails about their login activity on a subject basis as students may receive multiple emails for the same issue, and this could be overwhelming for them. It may be helpful to talk to the subject convener or retention team about ways that this may be followed up within your school.
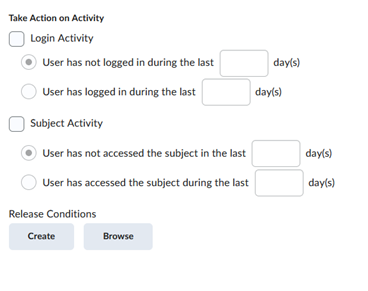
After you make your initial selection between login activity/subject activity/release conditions further options will appear, allowing you to precisely define the criteria for the agent.
In this example, we have selected Release conditions > Classlist > Group Enrolment
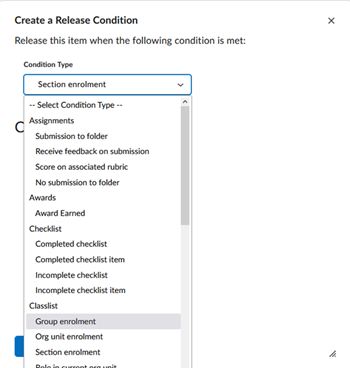
You can then choose if all conditions must be met or any of the conditions. In this case we simply want to send a welcome email to the student who has signed up to any of the workshop slots, so we have selected “any condition must be met.”
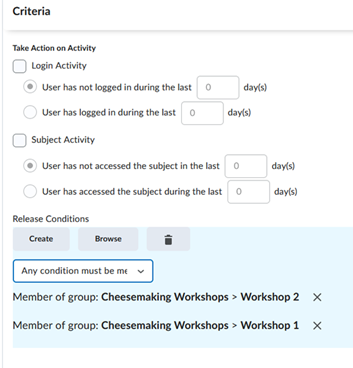
Start by selecting an Action Repetition setting, which determines how many emails an agent might send to users who satisfy its criteria. If you choose Take action only the first time the agent's criteria are satisfied for a user users will only receive one email no matter how many times the agent is run.
If Take action every time the agent is evaluated and the agent's criteria are satisfied for a user is selected, then an email is sent to all users that meet its criteria every time the agent is run.

You will then create an email template. In this example we are creating a welcome email to the student on signing up for a workshop.
The 'Send Email' form within intelligent agents features fields for recipient selection, subject line input, message composition, and attachment options.
Selecting recipients can be done by manually entering an email address, selecting an email address from the class contact list by clicking the address book icon, or using replace strings.
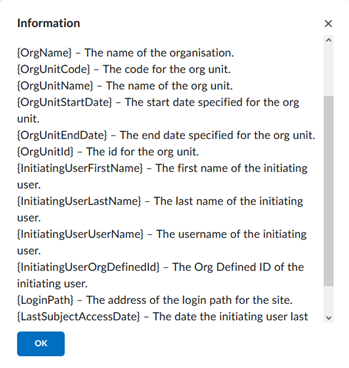
Replace Strings are placeholders that you can use within action emails that dynamically insert specific information related to the recipient, subject, or other relevant details.
The two replace strings available for recipient selection can be found by clicking What special email addresses can I use?
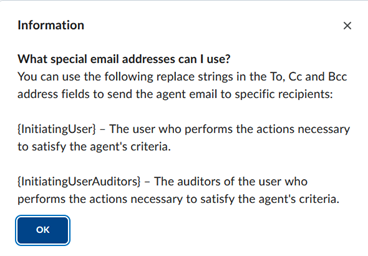
Replace strings can also be used in the message body to include the user/students first and/or last name, subject access dates, subject codes, and so on.
You can now compose the email message you wish to be sent out. The form uses the typical Brightspace editor which allows for the use of images, and the insert stuff and quicklinks menus.
In the example below we have used a release string in the to field and one in the message body. The editor allows you to use quicklinks, insert stuff, and all the other features of the Brightspace editor.
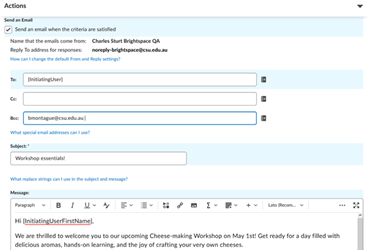
The email that is generated as a result of running the intelligent agent will appear like this:
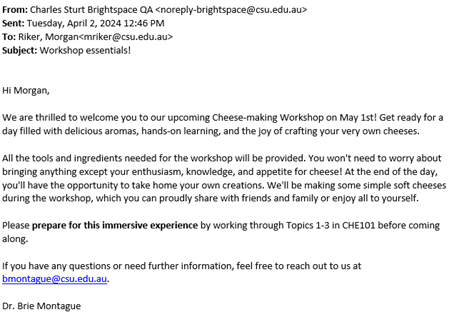
To view a list of replace strings that can be used in the message body click on What replace strings can I use in the subject and message?

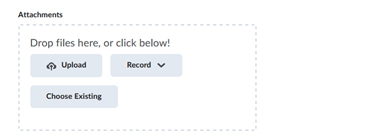
You are also able to add attachments to the email:
Remember to save your intelligent agent before exiting the screen!

This section covers running and modifying existing intelligent agents. Intelligent agents can be run manually or in practice mode and their results can be viewed. You can also copy and edit intelligent agents.
This page may be updated at any time. If you print it, you could miss future changes. Please check this page regularly for the latest updates.
Access the intelligent agents page from the Subject Admin > Intelligent agents.
You will see a list of the intelligent agents created in the subject, which you can enable, disable, or delete.
If you have set up an automatic schedule when creating the intelligent agent, it will run on that schedule and will display the results of the last run on the screen. Remember to enable it by clicking the checkbox next to the agent and selecting enable.
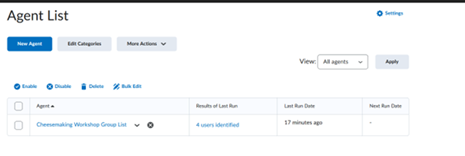
If you have not specified a schedule, you can run the intelligent agent manually. Click the down arrow next to the intelligent agent you want to run and select Run Now.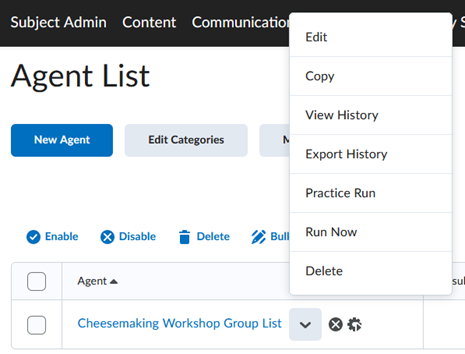
Copying an intelligent agent in Brightspace allows academics to swiftly replicate automated emails. You may, for example, set up email reminders for assignment deadlines. Copying an intelligent agent provides you with the same template and format as previous communications and can be edited to include the appropriate information.
Access the intelligent agents page from the Subject Admin > Intelligent agents. Click the drop-down arrow next to the intelligent agent and select Copy.

The copied agent will appear in the Agent list.
You can now edit the copied agent to change the name and any or all of the settings.
Access the intelligent agents page from Subject Admin > Intelligent Agents. Click the drop-down arrow next to the intelligent agent you wish to change and select edit.

A practice run will not send emails to those identified by the agent. Its purpose is to list which students will be identified if it happened to run. Practice runs can be completed on disabled agents.
Access the intelligent agent via Subject Admin> Intelligent Agents
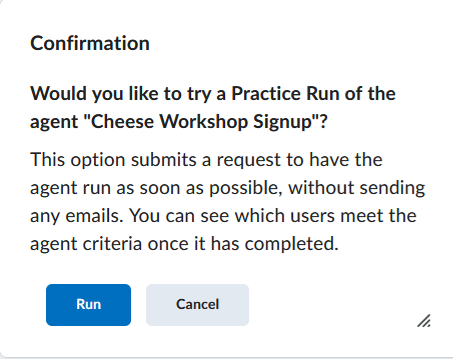
Click the drop-down arrow next to the intelligent agent and select Practice Run.

A confirmation screen will appear. Click on Run.

Go to the agent list page via subject admin > intelligent agents. Click on the users identified in the results column to view the results of the latest run of the intelligent agent.

If you have set an intelligent agent to run on multiple occasions, you can also click the drop-down arrow next to the intelligent agent and select History to see the results of each run.
In this example, on the view history screen, you can see that we have run the intelligent agent twice. We will click on the most recent one to view the results.
![Click on the users identified in the results column to view the results of that run of the intelligent agent]](https://cdn.csu.edu.au/__data/assets/image/0003/4304568/intelligentagents21.png)
After you click into the agent you will see the results of our practice run, which list the students identified and the action taken. In this case, no action was taken, as this was a practice run.

When a manual or scheduled run is completed, the action taken will show that an email has been sent.
This page may be updated at any time. If you print it, you could miss future changes. Please check this page regularly for the latest updates.