Panopto folders follow the same structure as Brightspace in that there are both Master and Subject folders. The subject folder sits within the subject site within Brightspace and is denoted by the S- prefix at the beginning of the folder name.
There are two main uses for the subject session folder for Panopto:
This article explores using the CSU Panopto folder within a subject site for managing Panopto recordings within a particular teaching session.
Access your subject site in Brightspace.
Navigate to Panopto via My Subject > CSU Replay (Panopto)
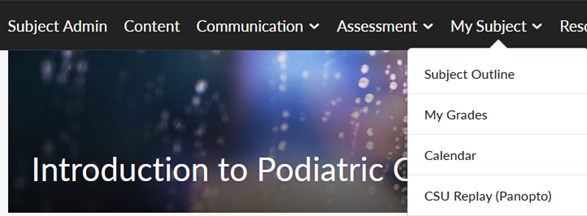
The first time that you do this it will take a few moments for the screen to load as Panopto is enabled in the background. Then the Panopto folder for the subject will open.
The folder in Panopto takes the same name as the subject itself, so it includes the session subject code.
If you have bookings for lecture capture in Panopto (non-IVT lecture recordings) they will appear automatically after the lecture has been completed in the subject session site folder. This is where students will be able to access and view them.
If you require your face-to-face lecture/s to be automatically recorded, they must be booked in advance. To schedule your lecture, you should use this form: https://staff.csu.edu.au/division/information-technology/forms/csu-replay-learning-and-teaching-registration-form
A minimum of 2 weeks’ notice is required to ensure your Panopto lecture recording can be processed and scheduled on-time.
You can create and upload videos into your Panopto session folder. Remember that these will only be available within that session site.
If you are creating recordings that need to be embedded into your content and re-used across multiple sessions you should do this within your subject Master site. See Embedding Panopto into learning resources for more information.
To add a video to the Panopto session folder, navigate to the Panopto folder and click on Create.

You will see that there are several different options:
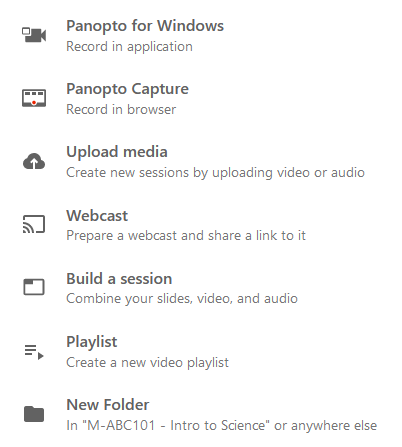
To create a new recording select Panopto Capture: This option launches Panopto Capture, which allows a user to easily record audio, video, entire screens, or application windows from directly within their browser, and no download is required.
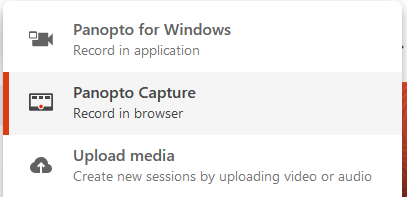
Panopto Capture will launch in a new browser tab. Choose your recording options:

You can also adjust the settings for recording options (SD/HD quality), stream output, video layout, and background by selecting the cog icon. 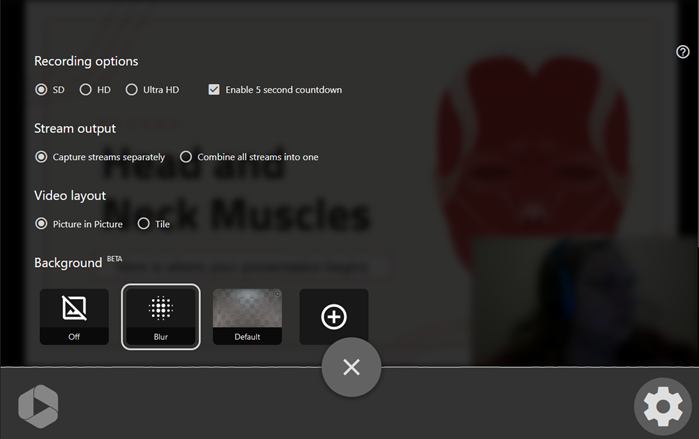
Click the red circle button to start recording. 
Click the red square button to stop recording. 
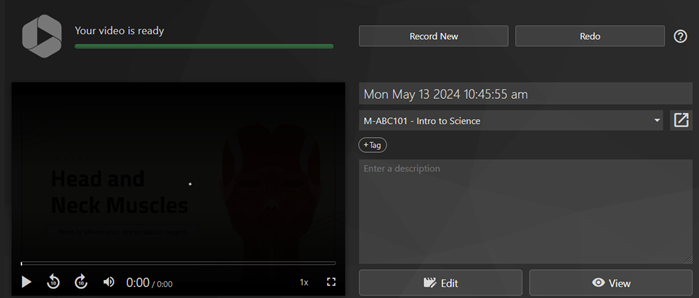
The recording will automatically upload to Panopto. On the confirmation screen you can view a preview, redo if needed, and give a meaningful title to the recording. The ideal naming would include subject code, topic/lecture/ title of video. This allows the video to be easily identifiable and finding the video is easier due to being able to search on a subject code. It also means if the student opens the video up in Panopto, they have the context of the subject and the content it relates to. E.g. ABC123 Topic 1/Lecture 1: Biology
To upload a recording you have already made, choose Upload media. This option will allow you to upload audio files, a single video, or multiple videos that will create new Panopto Sessions. 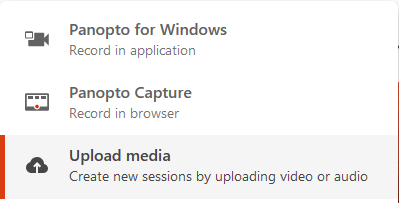
Click in the dotted field to open the browse window and locate the file on your computer, or use the drag-and-drop function to drop the video into the field. 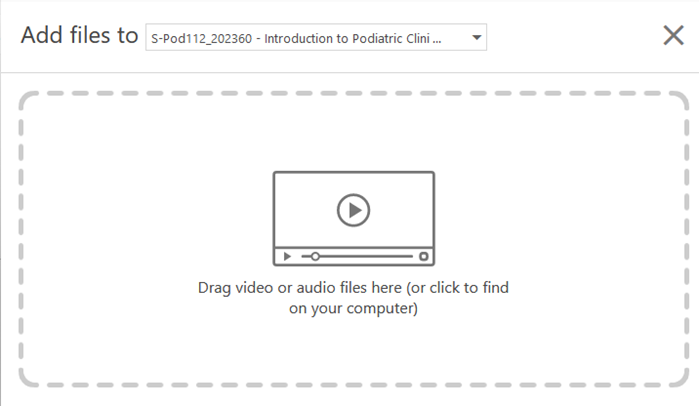
The file will upload, and you will see a confirmation screen with the name of the video and upload status listed. 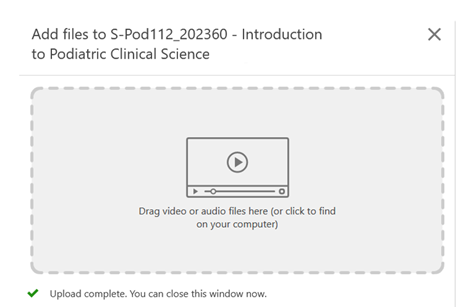
You are also able to download and use Panopto for Windows to create and upload your videos. Panopto for Windows offers some additional features for recording with multiple sources and live streaming.
For copyright guidelines refer to:
Academics are required to place a sign in the lecture theatre indicating that the lecture is being recorded and notify students verbally at the commencement of the lecture.
Be aware that recordings may hold resources that contain images and voices of deceased persons which can cause sadness and distress to Aboriginal and Torres Strait Islanders, and offend against strongly held cultural prohibitions. This material should be used with sensitivity. Queries regarding the appropriate use of Indigenous educational material should be directed to the Indigenous Curriculum and Pedagogy Coordinator in the First Nations Curriculum area of the Division of Learning and Teaching.
Lectures can be recorded using Interactive Video Teaching (IVT) rooms or the CSU Replay remote capture. Both options capture audio and information displayed on the projector in the room.
In an IVT room, the lecture will be captured using the video conferencing system. These rooms can be identified by the video conference microphone on the lectern.
All other rooms that have CSU Replay recording capability will have the Delcom lights on the lectern.
You have the option to record a PowerPoint presentation only with audio:
Note: If you wish to record something else in addition to the PowerPoint presentation, you have to record the screen as well. This will make the recording a slightly larger file.
In a non-IVT lecture room, recordings will be via Panopto and uploaded automatically to your Subject.
If you have recorded on your laptop using Panopto (not in a classroom) you can upload audio and\or video recordings using the Upload Media option in the Create menu of CSU Replay (Panopto) in Brightspace.
You must ensure the recordings do not breach Charles Sturt policies and copyright.
This page may be updated at any time. If you print it, you could miss future changes. Please check this page regularly for the latest updates.